Table of Contents
This post may contain affiliate links, meaning we may earn a small commission at no extra cost to you. We only recommend products we trust, and your support helps us continue creating helpful content.
If there is one piece of advice I give to every single new blogger, it is this: start your email list today.
Not tomorrow. Not after you have published 50 posts. Right now.
When I first started blogging, I ignored email marketing. I thought, “Who wants another email in their inbox?” I focused entirely on social media and Pinterest traffic. While those traffic sources are amazing, they have a fatal flaw: you don’t own them. Algorithms change. Accounts get suspended. Reach drops overnight.
But your email list? That is an asset you own.
Learning how to build a blog email list was the turning point that allowed me to quit my day job and blog full-time. It is the most direct way to speak to your readers, build trust, and yes—make money.
Whether you are brand new to the blogging world or you have been writing for years with zero subscribers, this guide is for you. I am going to walk you through exactly how to build a blog email list from scratch, choose the right tools, and turn casual visitors into raving fans.
Let’s dive in.
Why You Must Build A Blog Email List ASAP
You might be thinking, “I have Instagram followers, why do I need emails?”
Here is the hard truth: social media is like renting a house. The landlord (Facebook, Instagram, TikTok) can change the locks at any time. Your email list is a house you own.
When you build a blog email list, you are creating a direct line of communication. Did you know that email marketing has an ROI (Return on Investment) of $42 for every $1 spent? That is significantly higher than any social media platform.
The “Money Is In The List”
You have probably heard this phrase before, and it is true. Here is why:
- You Own the Data: No one can take your list away from you.
- Higher Conversion Rates: People are far more likely to buy a product recommended in an email than a tweet.
- Traffic On Tap: Whenever you publish a new blog post, you can email your list and get instant traffic.
- Deep Connection: Email feels personal. It’s a one-on-one conversation between you and your reader.
If you are serious about making money with your blog, you need to prioritize this.
Step 1: Choose Your Email Marketing Platform
The first step to build a blog email list is choosing an Email Service Provider (ESP).
Important: Do not try to use your personal Gmail or Outlook account for this. It is illegal to send mass marketing emails from a personal address (due to CAN-SPAM laws), and your emails will end up in spam folders. You need a legitimate service.
There are dozens of options out there, but I have narrowed it down to the best ones based on my experience and what I recommend to my students.
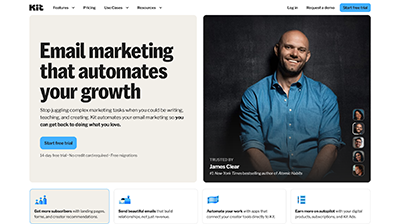
The Best for Creators: Kit (Formerly ConvertKit)
If you are a blogger, Kit is widely considered the gold standard. It was built specifically for creators.
I love Kit because it focuses on plain-text emails that feel like they are coming from a friend. It doesn’t get bogged down with messy graphics that often trigger spam filters.
- Why use it: Their automation features are incredible. You can easily tag subscribers based on what links they click (e.g., “Interested in SEO” or “Interested in Budgeting”) and send them content specific to their interests.
- Pricing: They have a generous free plan for up to 1,000 subscribers, which is perfect for beginners.

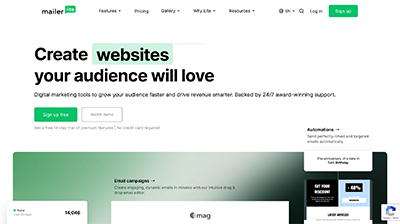
The Best for Beginners on a Budget: MailerLite
If you want something that is incredibly easy to use and very affordable, MailerLite is a fantastic choice.
Many of my students start here because the interface is drag-and-drop simple. If the idea of “tech” scares you, MailerLite is a gentle entry point. They also offer a free plan that includes access to automation features, which is rare for free tiers.
- Why use it: Simple interface, great landing page builder, and very affordable paid tiers as you grow.
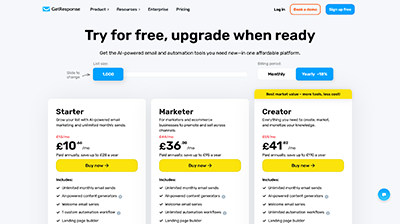
The Best for Visuals: GetResponse
Do you want your emails to look like stunning newsletters with beautiful headers and graphics? Then GetResponse might be for you.
While I generally prefer simple text emails, some niches (like fashion, food, or interior design) really benefit from a visual-heavy approach. GetResponse makes it easy to design professional-looking emails without needing to know code.
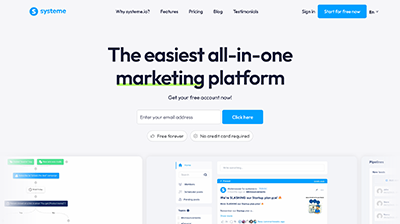
The All-In-One Solution: Systeme.io
If you are looking to save money by having your blog course hosting, email marketing, and funnel building all in one place, Systeme is a powerful contender.
It is rapidly becoming a favorite for bloggers who want to sell digital products immediately. Instead of paying for a separate course platform and an email provider, Systeme does both.
Step 2: Create An Irresistible Lead Magnet
Here is the secret: Nobody wakes up in the morning wanting to join another “newsletter.”
People want solutions to their problems.
To build a blog email list effectively, you need a Lead Magnet (also called a “freebie” or “opt-in incentive”). This is something valuable you give away for free in exchange for an email address.
What Makes a Good Lead Magnet?
- It solves a specific problem: Instead of “Sign up for updates,” offer “The 5-Step Guide to Saving $1,000 This Month.”
- It offers a quick win: It should be something they can consume in 10-15 minutes.
- It is relevant: It must attract the right people. If you blog about vegan cooking, don’t give away an iPad. Give away a “Vegan Grocery List.”
Examples of High-Converting Freebies
- Checklists: “The Ultimate Blog Post SEO Checklist”
- Cheat Sheets: “50 Pinterest Group Boards to Join”
- Templates: “Budget Spreadsheet Template”
- Mini-Course: “5-Day Email Course to Declutter Your Home”
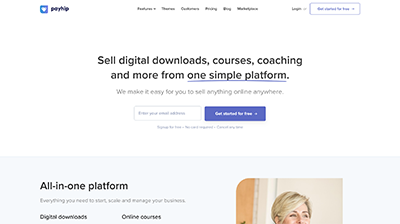
Pro Tip: Deliver Your Digital Products with PayHip
If your lead magnet is a digital file (like a PDF planner or an eBook), you need a way to deliver it securely. While most email providers let you attach a file, I recommend setting up a store front early.
PayHip is an amazing platform for selling (or giving away) digital downloads. You can set the price to $0.00.
Why use PayHip for a freebie? Because it gets people used to your “shop” interface. Later, when you launch a paid product, they are already familiar with the checkout process.
Step 3: Place Signup Forms Strategically
Once you have your lead magnet and your email platform, you need to put signup forms on your blog. If you hide your form in the footer, your list will not grow.
To build a blog email list fast, you need to be aggressive (but polite) with your placements.
High-Conversion Locations
- Above the Fold: Put a form near the top of your homepage.
- In-Content (The “Content Upgrade”): This is my favorite strategy. If you are writing a post about “How to meal prep,” put a signup form in the middle of the post offering a “Free Meal Prep Calendar.” This is highly relevant and converts at a massive rate.
- The Sticky Sidebar: A sidebar that follows the reader as they scroll ensures your offer is always visible.
- Exit-Intent Popup: I know, people say they hate popups. But guess what? They work. Set your popup to appear only when someone moves their mouse to leave the page (exit intent). This captures readers before they are gone forever.
- Your “About Me” Page: This is often one of the most visited pages on a blog. Don’t waste that traffic!
Step 4: The Technical Setup (Double Opt-In and Legal)
We need to cover the boring but essential stuff. If you don’t set this up correctly, your emails might not get delivered, or you could get in trouble.
Double Opt-In vs. Single Opt-In
When someone signs up, do they get added immediately (Single), or do they have to click a confirmation link in an email (Double)?
I recommend Double Opt-In when you are learning how to build a blog email list.
- Pros: It ensures the email address is real. It prevents bots from spamming your list. It improves your “Deliverability” (the reputation of your email server).
- Cons: You might lose some subscribers who forget to confirm.
However, a smaller, engaged list is worth infinitely more than a large list of bots and fake emails.
Legal Requirements (GDPR and CAN-SPAM)
- Physical Address: By law (CAN-SPAM act), you must include a physical mailing address at the bottom of every email. You cannot use your home address if you value privacy. I recommend getting a PO Box or a virtual mailbox.
- Unsubscribe Link: Never hide this. It must be easy for people to leave your list.
- GDPR: If you have readers in Europe, you need to be transparent about how you use their data. Most platforms like Kit and MailerLite have built-in GDPR settings to help you comply.
Step 5: Write Your Welcome Sequence (The Nurture Phase)
Imagine you meet someone at a party, exchange numbers, and then you immediately try to sell them insurance. They would run away.
The same happens with email. When someone joins your list, you need to welcome them. This is done through an automated Welcome Sequence.
What to include in your Welcome Series:
Email 1: Delivery & Welcome (Sent Immediately)
- Deliver the freebie you promised (link to the file).
- Introduce yourself briefly.
- Tell them what to expect (e.g., “I’ll be emailing you weekly with tips”).
Email 2: Value & Backstory (Sent 1 day later)
- Share your personal story. Why did you start this blog?
- Share a struggle you overcame that relates to your niche.
- Ask them a question: “What is your biggest struggle with [topic] right now? Hit reply and let me know.” (Replies are great for Gmail deliverability!)
Email 3: Your Best Content (Sent 2-3 days later)
- Share links to your top 3 most popular blog posts.
- This drives traffic back to your site and shows off your expertise.
Platforms like Kit make setting up these sequences incredibly easy using their visual automation builder.
Step 6: Traffic Strategies To Grow Your List
You can have the best lead magnet in the world, but if nobody sees it, you won’t build a blog email list. You need traffic.
Pinterest Marketing
Pinterest is a search engine, not just social media. Create vertical pins that advertise your Lead Magnet, not just your blog post.
- Pin Title Idea: “Free Budget Planner Printable”
- Pin Image: Show a preview of the planner.
- Link: Send them to a landing page dedicated to that freebie.
SEO (Search Engine Optimization)
Write blog posts that answer questions related to your lead magnet. If you want to build a list of people interested in “Dog Training,” write posts about “How to stop a puppy from biting” and offer a “Puppy Training Checklist” inside that post.
Guest Posting
Write articles for other bigger blogs in your niche. In your author bio, link to your landing page, not just your homepage. This taps into other people’s audiences.
Step 7: How To Monetize Your Email List
This is the fun part. How do you actually make money once you build a blog email list?
You do not want to spam your list with sales pitches every day. The rule of thumb is the 80/20 rule: 80% value, 20% promotion.
1. Affiliate Marketing in Emails
This is the easiest way to start. If you are sharing a tip about how to start a blog, include your affiliate link for your host. If you are talking about skincare, link to the products you use.
Example: “I used to struggle with organizing my day until I found [Product Name]. It changed everything. You can check it out here (affiliate link).”
2. The “Tripwire” Offer
Remember Systeme or PayHip? You can set up a “Tripwire.”
Here is how it works:
- User signs up for your freebie.
- Instead of a “Thank You” page, they are redirected to a sales page.
- Offer a small, low-priced product (e.g., $7 – $19) related to the freebie.
- “Wait! Your freebie is on its way to your inbox. But while you are here, grab my Advanced Guide for only $7 (usually $47).”
This covers your ad costs (if you run ads) and turns a subscriber into a customer immediately.
3. Sell Your Own Products
Once your list grows, you can launch courses, eBooks, or coaching services. Because your list trusts you, they are much more likely to buy from you than a stranger.
Common Mistakes When Building an Email List
I have made plenty of mistakes on my journey. Here are a few to avoid so you can build a blog email list faster than I did.
Mistake 1: Ignoring Analytics
You need to know what works. Check your open rates.
- Good Open Rate: 20-30%
- Good Click Rate: 2-5% If your open rates are low, your subject lines need work. If clicks are low, your content isn’t compelling enough.
Mistake 2: Being Inconsistent
If you ghost your list for 3 months and then suddenly email them to sell something, they will unsubscribe. They won’t remember who you are. Consistency builds trust.
Mistake 3: Buying an Email List
Never, ever do this. It is illegal, against the terms of service of every ESP (like MailerLite and Kit), and it simply doesn’t work. Those people did not ask to hear from you.
Comparison Table: Best Email Tools for Bloggers
To help you decide, here is a quick comparison of the tools we discussed to help you build a blog email list.
| Platform | Best For | Key Feature | Free Plan? |
| Kit (ConvertKit) | Professional Bloggers | Visual Automations & Tagging | Yes (1,000 subs) |
| MailerLite | Beginners on a Budget | Drag-and-Drop Builder | Yes (1,000 subs) |
| Systeme | Selling Products | All-In-One (Funnels + Email) | Yes |
| GetResponse | Visual Designers | Beautiful Templates | Free Trial |
FAQ: Frequently Asked Questions About How to Build a Blog Email List.
How often should I email my list?
I recommend once a week. It keeps you top of mind without being annoying. Pick a day (like Tuesday mornings) and stick to it so your readers know when to expect you.
What if I have nothing to sell yet?
That is actually the best time to start! Use this time to build trust and provide value. By the time you do have something to sell, you will have an audience ready to buy.
How do I get my first 100 subscribers?
Reach out to your personal network, put the link in your Instagram bio, and create one high-quality lead magnet. Join Facebook groups for bloggers and share your freebie (if allowed).
Can I switch email providers later?
Yes! It is very easy to export your list of subscribers from one platform (like MailerLite) and import them into another (like Kit). Don’t let “choosing the perfect tool” stop you from starting.
What is a “segment” in email marketing?
A segment is a specific group of people on your list. For example, you might have a segment of people who clicked on a link about “Travel” and another segment who clicked on “Saving Money.” This allows you to send targeted emails.
Is email marketing dead?
Absolutely not. Email marketing continues to outperform social media year after year. It is the only channel where you have 100% control over your reach.
Recommended Reading
- How to Grow Your Email List with Pinterest in 2025
- How to Monetize Your Email Campaigns: 5 Proven Strategies for Side Hustlers
- How to Create a Newsletter That Grows Your Business: The 2026 Blueprint.
- Online Income Ideas & Side Hustles to Make Money Online
Final Thoughts
Deciding to build a blog email list is an investment in your future freedom.
It can feel technical and overwhelming at first—setting up the forms, writing the sequences, figuring out the tech. But once it is set up, it runs on autopilot. You can be sleeping, traveling, or spending time with your family while your email list welcomes new readers and nurtures them into loyal followers.
Don’t wait until you feel “ready.” You are ready now.
Pick a tool (I recommend Kit or MailerLite), create a simple checklist as a freebie, and put that form on your site today. Your future self will thank you.