
Table of Contents
This post contains affiliate links. If you click through and buy something, I may earn a small commission — at no extra cost to you. I only recommend tools I’ve actually used or thoroughly researched.
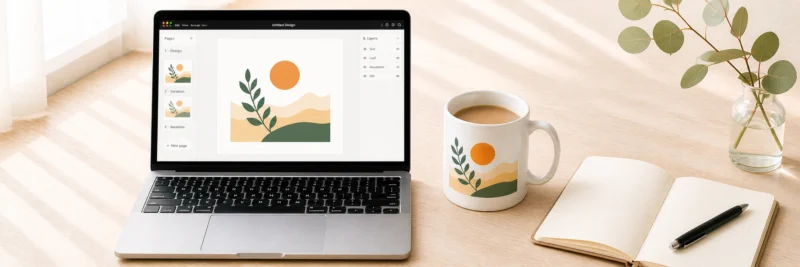
Canva is the tool most people hear about first when they start researching print on demand designs. And it’s genuinely the right recommendation — but knowing Canva exists and knowing how to use it correctly for POD are two different things.
A design that looks great on screen can print badly if the file isn’t set up right. The wrong canvas dimensions, a white background where there should be transparency, a low-resolution export — any of these will cause problems that only show up after the product has been printed and shipped to a customer.
This post covers the specific Canva workflow for print on demand — from canvas setup to export-ready file — so your first design is done correctly from the start. If you want the broader design strategy before getting into the Canva-specific walkthrough, the how to create designs for print on demand post covers the full picture first.
Why Canva Works for Print on Demand
Before getting into the how, it’s worth being clear on why Canva is the right tool for most POD beginners — and what its limitations are.
The free version covers everything most people need to get started. A large font library, a substantial element library, and the canvas size controls needed to design to exact product dimensions. Browser-based, no software to install, works on any device.
The learning curve is genuinely shallow. Canva is designed to be picked up quickly, and for the text-based and simple illustrated designs that perform best in POD, you don’t need to go deep into its features to produce something good.
Canva Pro adds a background remover, a larger element library, Magic Resize for adapting designs across product sizes, and a few other features useful at volume. For a beginner creating their first designs, the free plan is more than enough. Upgrade when the volume justifies it.
The honest limitations: Canva isn’t a professional vector tool. It doesn’t give you the precise CMYK colour control that Adobe Illustrator does. For most products on Printify — mugs, t-shirts, tote bags, phone cases — those limitations don’t matter in practice. Print quality on standard POD products is determined more by file resolution and format than by colour mode. But if precise brand colour matching matters to you, Canva’s colour management has limits worth knowing about.
Setting Up Canva Correctly for Print on Demand
This is the section most tutorials skip — and the one that determines whether your design actually prints well.
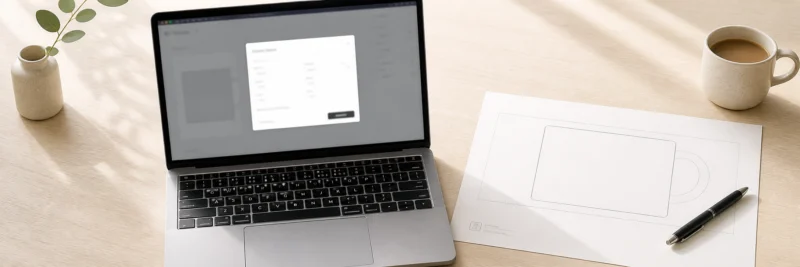
Step 1 — Get the Product Template from Printify First
Before you open Canva, go into Printify and find the specific product you’re designing for. Every product has a downloadable design template showing the exact pixel dimensions required, the print area, and any safe zones.
Download that template. Those dimensions are what you’ll set your Canva canvas to — not a generic t-shirt size from a Google search, not an approximation. The exact dimensions from the Printify template for that specific product.
This matters because Printify’s products have specific print area dimensions that vary by product and supplier. A design at the wrong dimensions will either be rejected during upload or print at the wrong scale — too small, too large, or incorrectly positioned on the product surface.
Step 2 — Create a Custom Canvas in Canva
Open Canva and click “Create a design” in the top right. Instead of choosing a preset format, click “Custom size” — it’s usually at the top of the dropdown. Enter the exact pixel dimensions from the Printify template. Width first, then height.
This creates a canvas that matches the print area of your specific product exactly. Everything you design within this canvas will be positioned and scaled correctly when you upload it to Printify.
Step 3 — Set Your Background to Transparent
Most POD products require a transparent background so the design sits cleanly on the product surface without a white box around it. A mug with a white rectangle behind the illustration doesn’t look intentional — it looks like a mistake.
In Canva, the default canvas has a white background layer. Before you start designing, click on that background layer and delete it. You’ll see a grey checkerboard pattern — that indicates transparency. Design on top of that.
The most common beginner mistake: designing on the white background without removing it, then exporting without realising it’s baked into the file. The resulting PNG has a white rectangle around the design that appears on the finished product. Delete the background layer before you design, not after.
Designing for Print on Demand in Canva

Canvas set up correctly — now the design itself.
Choosing Fonts That Work on Products
Fonts behave differently on physical products than they do on screen. A font that looks elegant in Canva’s preview can become unreadable once printed at actual product size — particularly on smaller items like phone cases, or at the scale of secondary text on a mug.
A few practical rules. Serif fonts feel classic and established — they work well for quote-style designs and profession-themed products. Sans-serif fonts feel clean and modern — the most versatile choice for most POD niches. Script fonts feel personal and handwritten — but only work at large sizes where they remain clearly readable. Never use a script font for small supporting text.
Use a maximum of two fonts per design. One for the headline or main message, one for supporting text if needed. More than two almost always looks cluttered on a physical product, even if it looked fine on screen.
The most important test: does it read clearly at thumbnail size? Shrink your browser window or zoom out until the design appears small. If anything is hard to read at that size, it won’t convert in an Etsy search result.
For the full breakdown of which design styles work best across different POD niches, the how to create designs for print on demand post covers it in detail.
Using Canva’s Element Library for POD Designs
Canva’s element library is large enough for most POD niche design work without needing to create illustrations from scratch. Search by keyword — “dog silhouette”, “botanical leaf”, “mountain range” — and filter by style to find elements that fit your niche.
Combining a simple element with niche-specific text is one of the most effective and accessible POD design approaches available. A small dachshund silhouette above “sausage dog mum” on a mug. A minimal mountain outline below “adventure awaits” on a water bottle. The element adds personality without requiring any illustration skills.
One important thing to check: not all elements in Canva’s library are free. Some require Canva Pro. More importantly, some elements are licensed for personal use only — which means using them in a commercial POD product may breach the licence terms. Before using any element in a design you plan to sell, click on it and check the licence information.
Keeping Designs Simple Enough to Sell
Canva makes it easy to keep adding things — more elements, more text layers, more decorative details. That ease is a trap for POD design.
The designs that sell best are usually the simplest ones. One clear message, one visual direction, one hierarchy where the eye knows immediately where to go first. Every element added beyond that competes for attention and weakens the overall impact.
Before adding anything, ask whether the design would be stronger without it. Usually the answer is yes.
This isn’t about making things look boring — it’s about making them work on a physical product at actual size, in a thumbnail search result, and for a specific person who needs to feel like the design was made for them. If you haven’t chosen your niche yet, the best niches for print on demand post covers the ten most profitable options with honest notes on each.
Checking Designs at Actual Product Size
Before exporting, check how the design looks at the scale it will actually print.
Zoom out in Canva until the design appears at roughly the size it will be on the finished product. For a mug design, that’s about 8–10cm in height on your screen. For a t-shirt, maybe 20–25cm. Check that the text is readable, the details are clear, and nothing is too small to register.
Then do the thumbnail test. Shrink the browser window until the design is thumbnail-sized — roughly the size it appears in an Etsy search result. If anything is unclear at that size, the listing will underperform regardless of how good the design looks at full size.
Fix any clarity issues now. Much easier than after a customer has left a review about an illegible design.
Download Your Free Print on Demand Starter Checklist
The two-page checklist that takes you from ‘no idea where to start’ to your first live listing — yours the second you sign up.
Exporting Your Canva Design for Printify
The export settings determine whether the file prints correctly. Here’s exactly what to set.
File Format — Always PNG
PNG supports transparent backgrounds and is the standard for Printify uploads. Never export POD designs as JPEG — the format doesn’t support transparency and the compression can affect print quality in ways that aren’t always visible on screen.
In Canva: click “Share” → “Download” → select “PNG” from the file type dropdown.
Resolution — Export at the Highest Quality Available
For print, you need a minimum of 300 DPI. In Canva’s download settings, look for a quality or resolution option and select the highest available — a slider or a checkbox labelled “high quality.” Tick it or set it to maximum.
A low-resolution export produces a blurry print. Blurry prints produce negative reviews. Thirty seconds here prevents a significant problem later.
Transparent Background — Tick This Before Downloading
In Canva’s download settings, tick the “transparent background” checkbox before downloading. Even if you deleted the background layer during design, ticking this confirms the exported PNG will have a transparent background rather than a default white fill.
If you forget this and export with a white background, the PNG will have a white fill even if your design looks transparent in Canva’s preview. Tick it every time, as a habit.
Uploading Your Canva Design to Printify
PNG exported correctly — right dimensions, transparent background, high resolution — the upload to Printify is straightforward.
Go to your Printify account, open the product editor, and upload the PNG. Use the design placement tool to centre it within the print area with adequate margin from the edges.
Then use Printify’s built-in preview to check the design on the actual product. Three things to confirm: the design is positioned as expected, the text is readable at product size, and nothing is getting cut off at the edges.
Fix any positioning issues in the Printify editor before publishing. It’s simple to adjust at this stage and much harder to correct after a listing is live and receiving traffic.
If you haven’t set up a Printify account yet, it’s free and takes about three minutes. For more detail on the platform before committing, the Printify review covers everything worth knowing.
Creating Mockup Images for Your Etsy Listing
Design uploaded and positioned correctly — next step is mockup images for the listing.
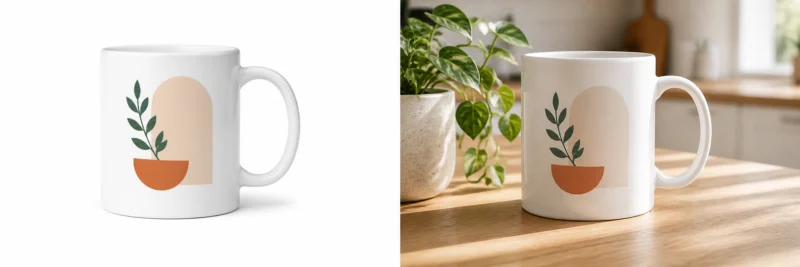
A flat design preview on a white background doesn’t sell products. A lifestyle mockup — your mug on a kitchen counter, your t-shirt being worn, your tote bag over a shoulder — gives the buyer a sense of what they’re actually purchasing. That context is what creates the “I want that” moment.
Printify’s built-in mockup generator creates basic product images from your design automatically. These are decent for showing the design on the product but they’re flat renders, not lifestyle images.
For lifestyle mockups, Placeit generates images of your product in real-world settings from your design file in minutes. A mug in a warm kitchen. A t-shirt being worn in a park. A tote bag over a shoulder on a bright street. These are the images that convert browsers into buyers.
Aim for five to eight mockup images per listing. Use a mix of Printify’s flat renders and Placeit lifestyle images to give buyers a complete picture of the product.
For the full Etsy listing setup — titles, tags, pricing, and everything beyond the mockups — the print on demand on Etsy guide covers the complete process.
Common Canva POD Mistakes to Avoid
Four things that cost beginners sales before a listing even goes live.
Wrong canvas dimensions. Always get the template from Printify first and set your canvas to those exact dimensions. Designing to a generic size and hoping it fits is a reliable way to end up with a poorly scaled print.
White background on the exported file. Delete the background layer before designing. Tick “transparent background” before exporting. Both steps, every time.
Low resolution export. Always select the highest quality export option in Canva. Thirty seconds that prevents blurry prints and negative reviews.
Too many elements. Canva makes it easy to keep adding things. One message, one direction, clean hierarchy. Every element beyond that weakens the design.
Ready to Create Your First Design?
Canva and Printify together cover everything needed to go from design idea to live Etsy listing — no prior design experience, no technical background required.
Open Canva, get the product template dimensions from your Printify account, set up your canvas, and create one design. Simple, niche-specific, and correct from the start.
Once it’s uploaded and live, the print on demand on Etsy guide covers the full listing setup. And for the complete beginner overview from the beginning, the print on demand side hustle guide covers everything in order.