
Table of Contents
This post contains affiliate links. If you click through and buy something, I may earn a small commission — at no extra cost to you. I only recommend tools I’ve actually used or thoroughly researched.
If you want to know how to start a blog, you’re in the right place. I’ll walk you through the whole thing, start to finish.
I started thesidehustler.blog with zero blogging experience. What I didn’t expect was how much I’d enjoy it, or how quickly it could start making money. The blog now funds my life, including a planned move to a Mediterranean island, and it started with exactly the steps I’m about to share with you.
This post covers everything: picking a niche, setting up hosting, installing WordPress, writing your first post, and getting readers to actually find you. By the end, you’ll have everything you need to go from zero to a live, properly set-up blog.
Let’s get into it.
Ready to go right now? Hostinger is where I’d send any new blogger. Plans start at $2.69/month, your domain is free for the first year, and most people are live within two hours. Grab your hosting first, then follow the steps below.
How to Start a Blog: What You Need Before You Begin
Not much. Seriously.
You need a topic, a hosting plan, and a domain name. That’s it. You don’t need to be a tech wizard, you don’t need design skills, and you don’t need anything written before you start.
The whole setup takes a couple of hours, less if you follow this guide.
Here’s what this will cost you:
Hosting with Hostinger starts from around $2.69/month on their Premium plan (on a 48-month term). That’s less than a coffee. Your domain name is included free for the first year.
That’s the full cost to launch.
The tools I use to run this blog
Before we get into the steps, here’s a quick look at what’s running under the hood on thesidehustler.blog, so you know exactly what I’m recommending and why.
- Hosting: Hostinger: fast, affordable, and beginner-friendly. Plans from $2.69/month with a free domain included.
- SEO: Rank Math: comes pre-installed with Hostinger. The free version is all you need to start.
- Email list: MailerLite, free up to 250 subscribers with automation included on the free plan. This is where I’d start on day one.
- Content writing: SEOWriting AI, worth a look for speeding up research and first drafts. I’m still testing this one properly, so treat it as a starting point rather than a full endorsement.
Everything else I mention in this guide is free.
Step 1: Choose Your Blog Niche
Your niche is the topic your blog focuses on. And picking the right one matters, not because you need to find some untouched corner of the internet, but because focus makes everything easier.
A focused blog ranks better in search, attracts a loyal audience faster, and is much easier to monetize.
How to pick a niche that works:
- Genuine interest: You’ll be writing about this for a long time. Pick something you actually care about.
- Real audience: People need to be searching for this topic. Use Google to check; if there are other blogs and businesses in the space, there’s demand.
- Monetization potential: Not every topic pays equally. Blogging, finance, health, travel, and business niches tend to have strong affiliate programs and ad rates.
Some solid beginner niches: personal finance, food and recipes, travel, home and garden, parenting, wellness, DIY, blogging and online income.
Don’t overthink this. A slightly imperfect niche you’re excited about beats the “perfect” niche you burn out on in three months.

Step 2: Choose the Best Blogging Platform for 2026
For anyone who wants to build a real, long-term blog, one that earns money and that you own outright, WordPress.org is the answer.
Not WordPress.com (the free hosted version, limited and hard to monetize). WordPress.org is the self-hosted version you install on your own hosting. It’s free software, but you need a hosting plan to run it.
WordPress powers over 40% of all websites on the internet. There’s a reason for that.
It’s flexible, has thousands of free themes and plugins, and you have full control over everything. Most blogging tutorials, YouTube videos, and resources you’ll ever find are built around WordPress.
The alternative is a hosted platform like Squarespace or Wix. Fine for basic sites, but they’re limited when it comes to SEO customization and monetization. For serious blogging, WordPress.org wins.
Step 3: Pick a Hosting Provider
Your hosting is where your blog lives on the internet. Get this wrong and you’ll have slow load times, poor uptime, and a headache every time something breaks.
I use Hostinger for thesidehustler.blog: fast load times, a clean dashboard, and support that’s held up whenever I’ve needed it.
Hostinger current pricing as of mid-2026 (always verify before buying, hosting prices move around a lot):
| Plan | Intro Price | Renewal Price | Best For |
|---|---|---|---|
| Premium | From $2.69/month | From $10.99/month | New bloggers |
| Business | From $2.99/month | From $16.99/month | Growing blogs |
| Cloud Startup | From $7.19/month | From $24.99/month | High-traffic sites |
All plans include a free domain for the first year, free SSL certificate, and a 30-day money-back guarantee.
One thing I want to be upfront about: the low intro prices are for the full term paid upfront. So $2.69/month on the 48-month plan means paying around $129 upfront. Renewal jumps meaningfully after that, currently around $10.99/month for Premium, though it’s worth checking the exact figure at checkout since it shifts by region and promotion. This is standard across the hosting industry, not a Hostinger-specific thing, but I think you deserve to know before you sign up.
For a new blogger, the Premium plan is plenty. You can always upgrade later.
Start your blog with Hostinger here: free domain included, 30-day money-back guarantee.
Recommended reading: Hostinger Review: Is It Worth It for Bloggers?
Step 4: Register Your Domain Name
Your domain is your blog’s address: mine is thesidehustler.blog.
With Hostinger, your domain is included free for the first year when you sign up for any hosting plan. You register it right in the same process.
Tips for picking a good domain:
- Keep it short and easy to spell
- Go for .com if you can, it’s still the most trusted extension
- Avoid hyphens and numbers
- Make it memorable and relevant to your niche
Don’t spend days agonizing over this. Pick something decent and move on. The content matters far more than the domain name.
Step 5: Set Up WordPress on Hostinger
Once you’ve signed up for hosting and registered your domain, setting up WordPress is straightforward.
Hostinger uses hPanel (their own control panel, simpler than cPanel, which is what most other hosts use). It takes a bit of getting used to if you’ve used other hosts before, but for a beginner it’s easier to navigate.
Here’s the process:
- Log into your Hostinger account and go to hPanel
- Look for the WordPress section and click Install WordPress
- Choose your domain
- Set your admin username and password (save these somewhere safe)
- Click install: Hostinger handles the rest
The auto-installer takes a few minutes. When it’s done, you’ll have a fresh WordPress site running at your domain.
Recommended reading: How to Start a WordPress Blog on Hostinger (Step by Step)
Recommended reading: Build a Website for Your Home Business
Step 6: Configure Your Basic WordPress Settings
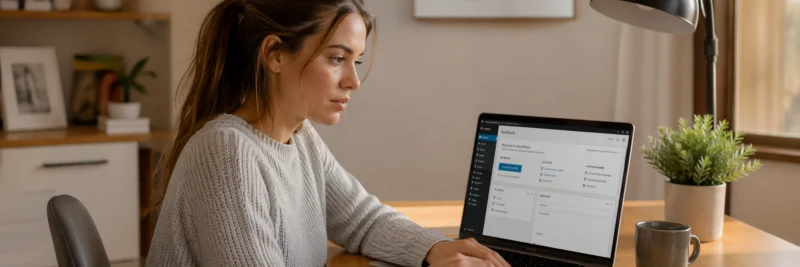
Before you start writing, sort out a few key settings. It only takes ten minutes.
Permalink structure: This is how your URLs look. Go to Settings → Permalinks and choose Post name. So your posts will be yoursite.com/post-title/ rather than yoursite.com/?p=123. Better for SEO, better for readers.
Time zone: Go to Settings → General and set your time zone correctly.
Site title and tagline: Also in Settings → General, add your blog name and a short description.
Delete the default content: WordPress installs with a sample post and a sample page. Delete both. Also delete the “Hello World” post.
That’s it. You’re ready to install a theme.
Step 7: Choose and Install a Theme
Your theme controls how your blog looks. The good news: there are hundreds of free themes that look professional.
For beginners, I’d recommend starting with a lightweight free theme. Astra and Kadence are both excellent, fast, clean, and easy to customize without touching any code.
Go to Appearance → Themes → Add New, search for your chosen theme, and click Install then Activate.
Don’t spend too long on this. A simple, clean theme beats a complicated premium theme every time. You can always change it later.
Step 8: Install Essential WordPress Plugins
Plugins add functionality to your WordPress site. You don’t need many, in fact, too many plugins slow your site down.
Here’s the essential list for a new blog:
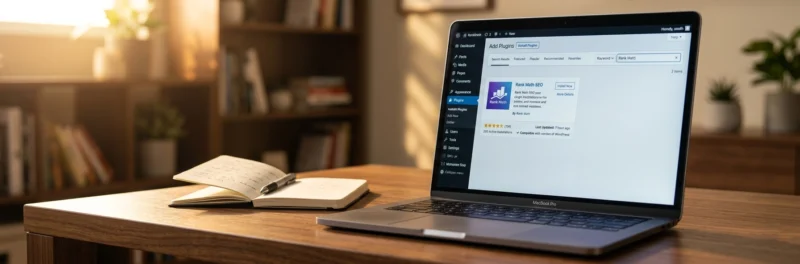
SEO: Rank Math Here’s something worth knowing: if you signed up with Hostinger, Rank Math is already pre-installed. You don’t need to find it or set it up, it’s there waiting for you.
Start with the free version. It covers everything a new blog needs: on-page SEO scoring, focus keywords, sitemaps, and Google Search Console integration. Solid, and completely free.
When you’re ready to track exactly how your keywords are ranking over time, or want Content AI’s research suggestions, Rank Math Pro is the upgrade worth making. But don’t rush it. Get comfortable with the free version first, it already covers secondary keywords and schema markup.
Caching: not needed If you’re hosting with Hostinger, LiteSpeed Cache comes built in. You don’t need to install a separate caching plugin, it’s already handled.
Security: Wordfence Free, solid, and catches most of the common threats.
Image optimization: Smush or ShortPixel Compresses your images without ruining the quality. Slow images kill your Google rankings.
Forms: WPForms Lite For a contact form. Comes free, does the job.
That’s your starter kit. Add more as you need them, not before.
Recommended reading: Best WordPress Plugins for Bloggers
Step 9: Write Your First Blog Posts
Here’s where most people stall. They get the site set up and then suddenly it’s very real and the blinking cursor is terrifying.
Don’t overthink it. Your first post doesn’t need to be perfect.
What to write about:
Start with topics your target reader is actively searching for. Don’t just write what you find interesting, write what people are Googling.
Use free keyword research tools like Google’s autocomplete, Answer The Public, or the free version of Ubersuggest. Type in your niche topic and look at what questions come up.
Post structure that works:
- A clear headline that tells the reader exactly what they’ll get
- A short intro that hooks them and tells them why this post matters to them
- Subheadings (H2 and H3) to break up the content and make it scannable
- Short paragraphs, 2 to 3 sentences max
- A clear conclusion with a next step
How long should your posts be?
Long enough to fully answer the question, not a word more. For most beginner topics, 1,500 to 2,500 words hits the sweet spot. Longer if the topic demands it.
Recommended reading: How to Write a Blog Post (That People Actually Read)
Step 10: Set Up SEO Basics
SEO (search engine optimization) is how Google finds your blog and decides where to rank it. Get the basics right from the start and you’ll save yourself a lot of pain later.
On-page SEO essentials:
- Focus keyword in your title: include the main phrase someone would search to find your post
- Focus keyword in your first paragraph: ideally the very first sentence
- Meta description: a 150-160 character summary of your post that appears in search results. Write this to earn the click, not just to describe the post
- Alt text on images: describe what’s in the image using natural language, including your keyword where it fits
- Internal links: link to your own related posts. This keeps readers on your site and helps Google understand your content structure
If you installed Rank Math in the previous step, it walks you through all of this as you write. That’s why it’s worth installing early.
Recommended reading: SEO Guide for Beginners

Step 11: Start Building Your Email List
This one surprises a lot of new bloggers. You’d think growing an email list is something you do once you’ve got traffic. The opposite is true.
Start your email list on day one.
Here’s why: social media algorithms change, Google rankings fluctuate, Pinterest reach goes up and down. Your email list is yours. Nobody can take your subscribers away from you.
Even if you’re getting 50 visitors a month, set up your email opt-in and start collecting subscribers.
Worried an email tool will be complicated to set up on day one? It doesn’t need to be. MailerLite is free up to 250 subscribers and 2,500 emails a month, with automation included on the free plan, so your welcome sequence can run itself while you focus on writing.
The tool I use is MailerLite. It’s free up to 250 subscribers and 2,500 emails a month, with automation included on the free plan, which means you can start collecting and following up before you pay a penny. When you outgrow it, Kit (formerly ConvertKit) is the natural next step, and it’s where I’m heading myself.
For growing that list, a lead magnet helps massively, something useful you give away free in exchange for an email address. I’ve put together a 7-step Blog Launch Roadmap that does exactly that. Grab it below.
Recommended reading: How to Build a Blog Email List From Scratch
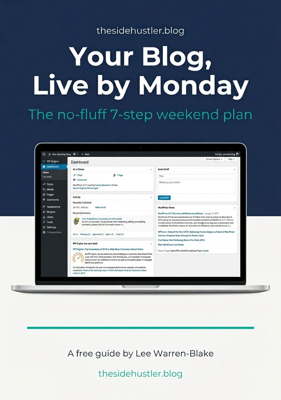
Download Your Free Blog Launch Roadmap
Get the no-fluff 7-step weekend plan that takes you from blank page to live blog — free instant download.
Step 12: Promote Your Blog
Publishing posts is just the beginning. If you don’t actively promote your content, it sits there unread.
Pinterest is one of the best traffic sources for new bloggers. Unlike Google, which can take 6 to 12 months to start sending organic traffic, Pinterest can start driving visitors within weeks.
Create a free Pinterest business account, design simple pin graphics (Canva makes this easy), and link every pin back to your blog post. For me, there was some traffic within the first month, though nothing major, and it built steadily from there, with the real growth showing up between months two and six.
Recommended reading: How to Promote Your Blog on Pinterest
Google search is the long game. Keep publishing useful, well-structured content and your rankings will grow over time. Six months in, you’ll start seeing the compound effect.
Email is where loyal readers live. Every new post, send an email to your list. Even a small, engaged list converts better than a huge, cold audience.
How to Make Money from Your Blog
Let’s talk about the part everyone wants to know about.
There are four main ways bloggers make money:
1. Affiliate marketing You recommend products and earn a commission when someone buys through your link. This is my main income stream, and one of the best models for bloggers: no product to create, no customer service, just honest recommendations.
The key is only promoting things you’ve used yourself and rate honestly. Readers trust personal experience. That trust is what converts.
Recommended reading: Affiliate Marketing for Bloggers (How It Actually Works)
2. Display advertising Once your traffic grows, you can apply to premium ad networks. Mediavine’s entry tier now starts at just 1,000+ monthly sessions through their Journey program, with their main network now judged on ad revenue rather than a flat session count, roughly $5,000 a year in ad revenue is the benchmark to aim for. Raptive lowered its threshold to 25,000 monthly pageviews in late 2025. Both pay far better than Google AdSense once you qualify. This is passive income once it’s set up: ads show on your site and you earn based on traffic.
3. Digital products Ebooks, courses, templates, printables. You create it once and sell it indefinitely. Higher effort upfront, but the margins are excellent.
4. Sponsored content Brands pay you to write posts featuring their product. This typically comes later, once you have an established audience, but it can be very lucrative when it does.
Recommended reading: Blog Monetization Strategies: How Bloggers Make Money
How Long Does It Take to Make Money Blogging?
Honest answer: longer than most people expect, but faster than most people fear.
Most bloggers start seeing meaningful affiliate income at the 6 to 12 month mark, assuming they’re publishing consistently and building their email list.
Display ads from a premium network typically kick in at the 12 to 18 month mark, though the lower Mediavine Journey and Raptive thresholds mean some blogs get there faster now.
The blogs that give up at month three never find out what month twelve looks like. The ones that stick around almost always get there.
I’m not going to promise you specific numbers because everyone’s niche, effort level, and audience is different. What I can tell you is that consistent content, smart SEO, and email list building add up to a blog that earns. Every time.
Common Blogging Mistakes to Avoid
I’ve made most of these myself. Learn from my experience so you don’t have to.
- Waiting until the blog “looks perfect” to publish: publish messy, improve over time
- Writing for yourself instead of your reader: every post should answer a real question someone is Googling
- Ignoring SEO from the start: the basics take ten minutes per post and make a massive difference over time
- Not building an email list: social platforms die, algorithms change, your list doesn’t
- Giving up too soon: blogs are slow to start and fast to grow once they get traction. The dip between month two and month six is where most people quit. Don’t.
Recommended reading: Blogging Mistakes I Wish I’d Avoided
Blogging Tools Worth Knowing About
As you grow, a few tools make the whole thing easier:
For writing: SEOWriting AI is worth knowing about. You give it a topic and some direction, and it builds a first draft you can work from. I’m still putting it through its paces properly on this blog, so I’ll hold off calling it a firm recommendation, but it’s a reasonable place to start if you want to speed up going from blank page to published post. Whatever you use, edit everything into your own voice before it publishes.
For SEO: Rank Math, already pre-installed if you’re on Hostinger, which is one more reason it’s my recommended host. The free version handles everything a growing blog needs, including secondary keywords and schema markup. When you want keyword rank tracking or Content AI’s suggestions, the Pro version is where serious bloggers go. Plus Google Search Console: free, straight from Google, tells you exactly which keywords are bringing people to your site.
For email: MailerLite. Free up to 250 subscribers with automation included, clean interface, easy to grow into.
For design: Canva. Free version does everything most bloggers need.
For analytics: Google Analytics 4, free and essential. Tells you where your traffic comes from, which posts perform best, and how readers behave on your site.
Recommended reading:
- Best Blogging Tools in 2026: The Honest Kit Every Blogger Actually Needs
- Best Blogging Platforms in 2026: 6 Honest Options for Every Type of Blogger
- How to Promote Your Blog: 8 Proven Ways to Get Your Content Seen
- WordPress Technical Setup Guide: 10 Essential Checks for a Fast, Secure Blog
Start Your Blog Today
If you’ve read this far, you have everything you need to start.
Here’s your action plan:
- Pick your niche
- Sign up for Hostinger and register your domain, free for the first year
- Install WordPress using the Hostinger auto-installer
- Rank Math is pre-installed, activate it and you’re ready for SEO from day one
- Write your first three posts
- Set up your email list with MailerLite, free up to 250 subscribers with automation included
- Look into a tool like SEOWriting AI if you want to speed up drafting (still testing this one myself)
- Create your Pinterest business account and start pinning
Don’t wait until everything is perfect. Get something live and improve it from there.
Everything above starts with one decision: where you host it. I use and recommend Hostinger, plans from $2.69/month, a free domain for your first year, and a 30-day money-back guarantee if it’s not for you. Most people are live within two hours of signing up.
I started thesidehustler.blog with no plan, no audience, and no certainty it would work. Since then, I’ve built an online income that supports the life I want, including a move to a Mediterranean island I’ve been planning for years. If you want the honest, unfiltered version of what that’s actually looked like since, including a Google penalty I had to rebuild from, here’s what building this blog has actually taught me.
Your story starts whenever you decide to begin.
Recommended reading: How to Blog Legally and Ethically: 8 Rules Every Blogger Must Know
Have questions about starting your blog? Drop them in the comments, I read every one.
