
Table of Contents
This post contains affiliate links. If you click through and buy something, I may earn a small commission — at no extra cost to you. I only recommend tools I’ve actually used or thoroughly researched.
If you want to know how to start a WordPress blog on Hostinger, this is the guide for you. I’ll walk you through the whole process — from signing up for hosting to having a live WordPress site — step by step.
The whole thing takes about an hour. Most of that is reading and deciding rather than doing. The actual technical setup is quick.
I use Hostinger for thesidehustler.blog, so everything in this guide is based on how it actually works — not how I think it works from the outside.
Let’s go.
Ready to go? Start your blog with Hostinger here — plans from $2.69/month, free domain for year one, and WordPress installs in minutes. Then follow this guide step by step.
How to Start a WordPress Blog on Hostinger: What You Need First
Not much. Just:
- A credit or debit card (or PayPal) to pay for hosting
- An email address for your account
- A rough idea of what your blog will be called (you’ll pick your domain name during signup)
That’s it. No technical knowledge required.
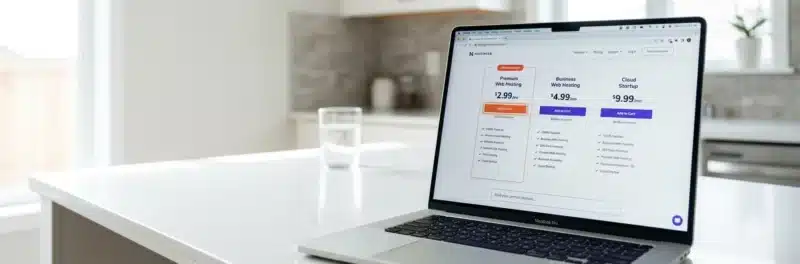
Step 1: Choose Your Hostinger Plan
Head to Hostinger and you’ll see the hosting plans laid out.
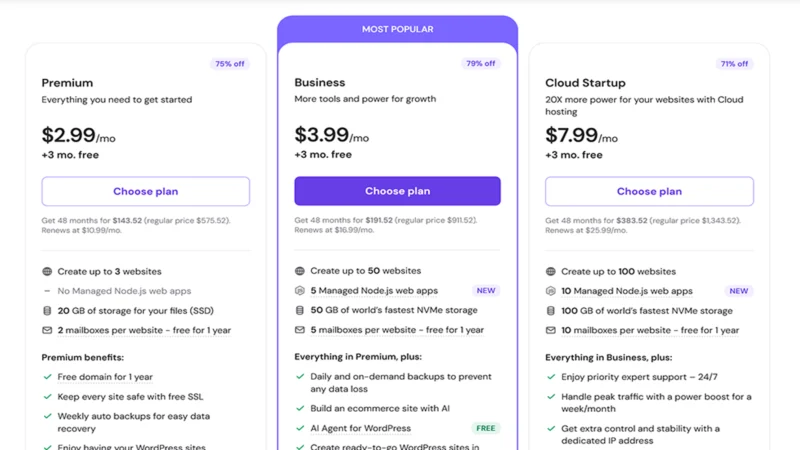
For a new blog, the Premium plan is the right starting point. It covers everything you need — 100GB of SSD storage, up to 100 websites, LiteSpeed Cache built in, free domain for the first year, and free SSL.
Current Hostinger pricing (mid-2026 — always verify before purchasing, as hosting prices and promos change often):
| Plan | Intro Price | Renewal Price | Best For |
|---|---|---|---|
| Premium | From $2.69/month | $10.99/month | New bloggers |
| Business | From $2.99/month | $16.99/month | Growing blogs |
| Cloud Startup | From $7.19/month | $18.99/month | High-traffic sites |
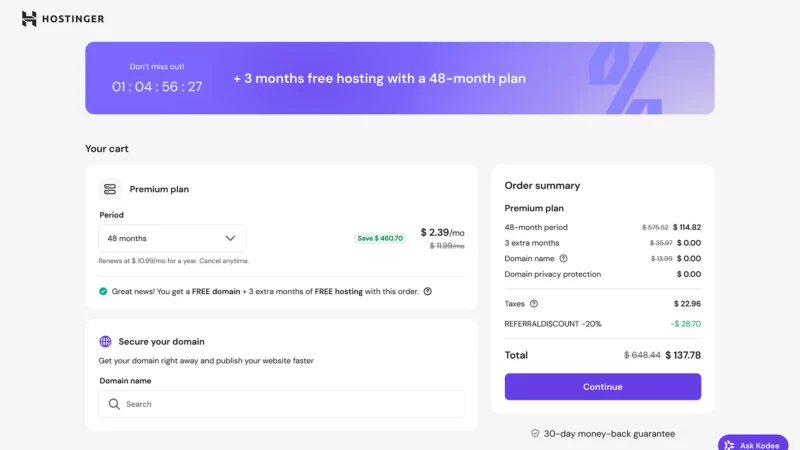
The intro price applies to the full term paid upfront. So the Premium plan at $2.69/month on a 48-month term is roughly $130 upfront. This is standard across the hosting industry — not a Hostinger-specific thing — but worth knowing before you click buy. One honest heads-up: if you pick the rolling monthly option instead of a longer term, Hostinger adds a small one-time setup fee — another reason the longer terms work out cheaper overall.
Head to Hostinger and choose your plan — then click Add to Cart on the Premium plan and continue below.
Step 2: Choose Your Term Length
You’ll be asked how long you want to sign up for — 1 month, 12 months, 24 months, or 48 months.
The longer the term, the lower the monthly rate. A 48-month plan gives you the lowest price per month. A 12-month plan is a reasonable middle ground if you’re not ready to commit to four years upfront.
My honest take: if you’re serious about blogging, commit to at least 12 months. Blogs take time to build — you won’t see meaningful results in a month or two. Signing up for longer saves you money and means you’re not renewing constantly.
Lock in your plan at Hostinger and move on to the next step.
Step 3: Register Your Domain Name
During checkout, Hostinger will ask if you want to claim your free domain. This is included with every plan for the first year.
Your domain is your blog’s address — mine is thesidehustler.blog. It’s how readers find you and how you’re identified online.
Tips for choosing your domain:
- Keep it short and easy to spell — the fewer characters the better
- Go for .com if you can — it’s still the most trusted extension
- Make it relevant to your niche or your name
- Avoid hyphens, numbers, and anything that’s hard to say out loud
- Don’t overthink it — a decent domain you can get today beats the perfect domain that’s already taken
Type your preferred domain into the search box to check availability. If your first choice is taken, try variations — different words, your name, or a slightly different phrase.
Once you’ve found one that works, select it and continue to checkout.
Step 4: Create Your Hostinger Account and Pay
You’ll be asked to create a Hostinger account with your email address, or you can sign up via Google.
Then you’ll enter your payment details and complete the purchase. Hostinger accepts credit cards, debit cards, and PayPal.
After payment, check your email — Hostinger will send you a confirmation with your account details and a link to get started.
Step 5: Log Into hPanel
hPanel is Hostinger’s control panel — where you manage everything about your hosting account. Think of it as the dashboard for your entire blog setup.
Log in at hpanel.hostinger.com using the email and password you created during signup.
If you’ve used other hosts before, hPanel will look different from cPanel — it’s Hostinger’s own interface rather than the industry-standard one. It’s clean and well-organized though, and most things are where you’d expect them to be. You’ll find your way around quickly.
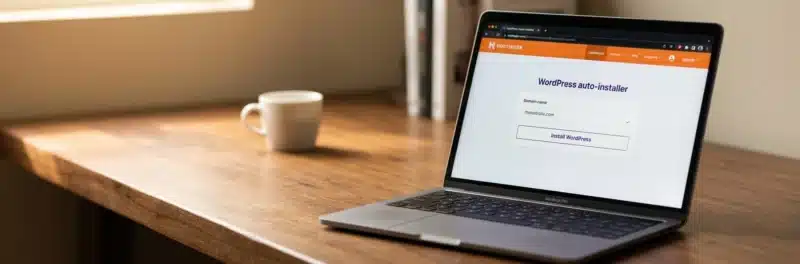
Step 6: Install WordPress
This is the bit most people are nervous about. It really doesn’t need to be.
In hPanel, look for the WordPress section — it’s usually prominently placed on the main dashboard. Click Install WordPress (or Auto Installer if you see that option first).
You’ll be asked to:
- Choose your domain — select the domain you registered during signup
- Set your WordPress admin username — pick something you’ll remember, not “admin” (that’s a security risk)
- Set your WordPress admin password — make this strong. Use a mix of letters, numbers, and symbols. Save it somewhere safe.
- Set your admin email address — this is where WordPress sends notifications and password resets
- Choose your language — English (United States) for US English content
Click Install and Hostinger does the rest. It takes a couple of minutes.
When it’s done, you’ll see a confirmation with two important links:
- Your site URL — your live blog address
- Your WordPress admin URL — usually yoursite.com/wp-admin — this is where you log into WordPress itself
Bookmark that admin URL. You’ll use it every time you want to write a post or make changes to your site.
Step 7: Log Into WordPress
Go to yoursite.com/wp-admin and log in with the username and password you set during installation.
You’re now inside WordPress itself. This is your content management system — where you’ll write posts, manage your design, install plugins, and do everything else that makes your blog run.
It looks like a lot at first. It isn’t. You’ll use maybe 20% of it regularly.
Step 8: Configure Your Essential WordPress Settings

Before you start writing or designing anything, sort out these settings. It takes ten minutes and saves headaches later.
Permalink structure: Go to Settings → Permalinks and select Post name. This makes your URLs look like yoursite.com/post-title/ instead of yoursite.com/?p=123. It’s better for SEO and better for readers.
Click Save Changes.
Site title and tagline: Go to Settings → General. Add your blog name as the site title and write a short description as the tagline. This appears in browser tabs and search results.
Time zone: Also in Settings → General — set your time zone correctly. This affects when scheduled posts go live.
Delete default content: WordPress installs with placeholder content — a “Hello World” post, a sample page, and a default comment. Delete all of them. Go to Posts, hover over “Hello World,” and click Trash. Do the same in Pages for the sample page.
Step 9: Choose and Install a Theme
Your theme controls how your blog looks. When you first set up WordPress through Hostinger, you’ll be offered two ways to get your theme in place — and it’s worth knowing what each one is before you click anything.
Option 1: Hostinger’s AI Website Builder
After WordPress is installed, Hostinger may prompt you to use their AI Website Builder. This tool asks you a few questions about your blog — niche, style preferences, color palette — and generates a starter design for you automatically.
It’s a reasonable option if you want something that looks put-together from day one with minimal effort. The designs are clean and the setup is fast. The trade-off is less control — you’re working within the AI’s choices rather than building from scratch.
If you go this route, you can still swap themes later through the WordPress dashboard, so you’re not locked in.
Option 2: Traditional Theme Selection (Recommended)
If you skip the AI builder and head straight into WordPress, you can choose and install a theme yourself. This is the approach I’d recommend — it gives you full control and the free theme options available are excellent.
Go to Appearance → Themes → Add New and search for one of these:
- Astra — fast, lightweight, clean. Works well with page builders if you want to customize later.
- Kadence — similar to Astra, very beginner-friendly, excellent free version.
- GeneratePress — minimal, extremely fast, popular with SEO-focused bloggers.
For what it’s worth, I went through three themes before I settled on Astra for this blog — so don’t feel you have to get it perfect first time. Pick one, click Install, then click Activate.
Don’t spend more than 20 minutes on this. A clean, simple free theme is absolutely fine for a new blog. You can change it later without losing your content — I did exactly that more than once.
Step 10: Install Your Essential Plugins
Plugins add features to WordPress. You don’t need many — too many plugins slow your site down. Stick to essentials.
Go to Plugins → Add New and install these:
Rank Math SEO This is the SEO plugin I use on thesidehustler.blog, and if you signed up with Hostinger it’s already pre-installed — you don’t need to find it or download it. Just activate it and run through the setup wizard. The free version covers everything a new blog needs — on-page SEO scoring, focus keywords, sitemaps, and Google Search Console integration. When you’re ready to target secondary keywords, add Schema markup, and unlock advanced reporting, that’s when Rank Math Pro is worth the upgrade. But start with free — it’ll serve you well for longer than you think.
Recommended reading: Rank Math Setup Guide: How to Configure It for Your Blog
Wordfence Security Free, solid, and catches most common threats. Activate it and run through the basic setup wizard.
Smush or ShortPixel Image optimization. Compresses your images automatically without ruining quality. Unoptimized images are one of the most common reasons blogs load slowly.
WPForms Lite A contact form for your Contact page. The free version does everything you need.
Note on caching: You don’t need a caching plugin. Hostinger includes LiteSpeed Cache built into every plan — it works automatically from the moment WordPress is installed. Installing another caching plugin on top of it can actually cause conflicts. Leave caching to Hostinger.
Step 11: Create Your Essential Pages
Every blog needs a few standard pages before you start publishing posts. These aren’t optional — they help with trust, SEO, and legal compliance.
About page: Who are you and what is this blog about? Keep it personal and real. This is often the second most visited page on a blog after the homepage.
Contact page: Add your WPForms contact form here. Readers, brands, and potential affiliates need a way to reach you.
Privacy Policy: Required by law if you collect any data (which you do — via analytics and email sign-ups). WordPress has a basic Privacy Policy template under Settings → Privacy — use it as a starting point.
Disclaimer/Disclosure: If you’re going to use affiliate links (which you should), you need an FTC disclosure. This can live on a dedicated page and be referenced in each post.
Go to Pages → Add New to create each one. Add them to your navigation menu via Appearance → Menus.
Step 12: Write Your First Blog Post

You’re set up. Time to publish.
Go to Posts → Add New. You’ll see the WordPress block editor (called Gutenberg). It works on blocks — each paragraph, heading, image, or list is its own block. It’s intuitive once you’ve spent ten minutes with it.
Write your first post, add an image, set your focus keyword in Rank Math’s panel on the right, and click Publish.
Your blog is live.
That’s it. You’ve done it. If you haven’t signed up for Hostinger yet and want to start fresh, grab your plan here — free domain, free SSL, and WordPress running in under an hour.
Recommended reading: How to Set Up a WordPress Blog: Everything After Installation
Recommended reading: How to Start a Blog in 2026 (Full Beginner’s Guide)
Download Your Free Blog Launch Roadmap
Get the no-fluff 7-step weekend plan that takes you from blank page to live blog — free instant download.
What to Do After Your Blog Is Live
Getting the site up is the start, not the finish. Here’s what to focus on next:
Publish consistently. One post a week is a solid pace for a new blogger. Two is better. Quality matters more than quantity, but consistency builds the habit and gives Google more to index.
Set up Google Analytics and Google Search Console. Both are free. Analytics tells you how many people visit and what they do on your site. Search Console tells you which search terms bring them there. Install them both before you have any traffic — you want the data from day one.
Start your email list. Even with ten visitors a day, set up your email opt-in. If you’re picking an email tool, Kit (formerly ConvertKit) is a solid place to start — its free plan covers you up to 10,000 subscribers.
Get on Pinterest. Pinterest can drive traffic to a new blog faster than Google. Create a business account, design simple pin graphics in Canva, and link every pin back to your posts.
Use AI carefully. Once you’re publishing regularly, AI can speed up the research and first-draft stage — I lean on Claude for that. But here’s the hard-won warning: don’t let it write your whole blog for you. I leaned far too heavily on raw AI content when I started this site, and it cost me — Google deindexed nearly every page and it took months to dig back out. It’s taken me a long time since to build an AI setup that genuinely helps me rather than working against me — and the difference is that I’m in charge of it, not the other way around. Use it as an assistant, keep your own voice and judgment in front, and you’ll stay on the right side of it.
Frequently Asked Questions
Do I need any technical skills to start a WordPress blog on Hostinger?
No. The Hostinger auto-installer handles the technical setup. If you can follow a step-by-step guide, you can do this. Get started with Hostinger here — the whole process is built for beginners.
How long does it take to set up?
From signing up for Hostinger to having a live WordPress site takes about 30 to 60 minutes, including choosing your domain and installing plugins.
Can I change my domain name later?
Technically yes, but it’s painful — you lose SEO rankings and have to set up redirects. Pick your domain carefully upfront and avoid changing it.
Do I need to buy a premium theme?
No. Astra, Kadence, and GeneratePress all have excellent free versions that are more than enough for a new blog.
What if something goes wrong during setup?
Hostinger’s 24/7 live chat support is there for exactly this. Don’t be afraid to use it — the support team is familiar with WordPress setup questions and can walk you through any issue.
Is my blog secure from day one?
Hostinger includes a free SSL certificate on every plan, which encrypts your site and gives you the padlock in the browser. Install Wordfence as your security plugin and you have solid basic security in place.
Have a question about setting up WordPress on Hostinger? Drop it in the comments — I’ll answer it.