
Table of Contents
This post contains affiliate links. If you click through and buy something, I may earn a small commission — at no extra cost to you. I only recommend tools I’ve actually used or thoroughly researched.
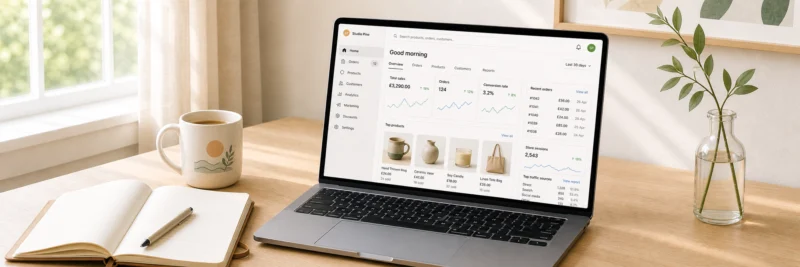
Print on demand on Etsy is one of those combinations that genuinely make sense together. Etsy brings the buyers — millions of people actively searching for exactly the kind of custom, niche, gift-ready products that POD produces. Print on demand brings the fulfilment — no stock, no packing, no trips to the post office. You handle the designs and the listings. Everything else runs without you.
Understanding Print on Demand on Etsy
The setup has a few steps that trip people up if they don’t know what’s coming. This guide walks through every one of them in order — from creating your accounts to publishing your first listing — so you can get your first product live without hitting the walls most beginners hit.
Why Etsy Is the Best Starting Point for Print on Demand
There are plenty of places to sell POD products — Shopify, your own website, social media. But for most beginners, Etsy is the right first move. And not just because it’s popular.
Etsy has built-in buyer intent. People don’t browse Etsy the way they browse Instagram — they arrive with something specific in mind. A personalised gift for a friend. A niche mug for a colleague. A piece of wall art for a spare room. That intent is worth an enormous amount when you’re a new shop with no existing audience.
The other thing Etsy gives you is discoverability without a marketing budget. Etsy’s internal search surfaces products to buyers who are already looking for them. You don’t need to run ads or build a following to get your first sale — you need good listings and the right keywords.
The downsides are real but manageable. Etsy charges fees — a £0.18 listing fee per product, a 6.5% transaction fee on each sale, and payment processing on top. And you’re building on someone else’s platform, which means you’re subject to their rules and algorithm changes. Worth knowing. Not a reason to avoid Etsy when you’re starting out.
For the full picture on how print on demand works before you dive into the setup, the print on demand side hustle guide covers everything from the basics to your first traffic strategy.
What You Need Before You Start
Before you touch any settings, make sure you have these things ready. The setup is smooth when you’re prepared and frustrating when you’re not.
- An Etsy seller account — free to create, but Etsy will ask for your payment and banking details before you can list anything. Have those ready before you start.
- A Printify account — also free. You’ll set this up as part of the walkthrough below.
- A product idea and a niche — if you haven’t decided what to sell yet, the best print on demand products post covers ten categories worth starting with and what makes each one work.
- A basic design or a plan for creating one — you don’t need it finished before you set up your accounts, but know roughly what you’re making before you start.
- A payment method for Etsy listing fees — £0.18 per listing, charged when you publish. A debit or credit card is fine.
Still deciding between Printify and Printful? The Printify vs Printful comparison gives you a straight answer on which one suits beginners better.
How to Set Up Your Etsy Shop
Step 1 — Create Your Etsy Seller Account
Go to etsy.com and click “Sell on Etsy” in the top navigation. If you already have a buyer account, you can convert it — or create a fresh one specifically for selling.
Etsy will walk you through account creation. Before you can open your shop, they’ll ask for your payment details — a bank account for receiving payouts and a card for paying fees. Have both ready. This is the step most people hit unexpectedly.
Step 2 — Set Up Your Shop Preferences
Once your account is created, Etsy will prompt you to set your shop preferences — language, country, and currency.
Choose the currency that matches your primary target market. Based in the UK and selling mainly to UK buyers? Set GBP. Targeting the US market? Set USD. You can sell to buyers anywhere regardless of which currency you choose — Etsy handles the conversion automatically.
Step 3 — Name Your Shop
Choose a name that’s broad enough to grow with. If you name your shop “DachshundMugsOnly” and later expand into other products or niches, you’re stuck with something that no longer fits.
Aim for something memorable, reasonably short, and not too niche-specific. It doesn’t need to describe exactly what you sell — it just needs to be easy to remember and search for. Etsy allows you to change your shop name once after opening, so don’t overthink it.
Step 4 — Complete Your Shop Profile
This step gets skipped more than any other — and it costs people sales and search visibility.
A complete Etsy shop profile includes a banner image, a logo, a filled-in About section, and shop policies covering processing times, returns, and exchanges. Buyers check these before purchasing, particularly for custom or personalised items. And Etsy’s algorithm favours complete shops over incomplete ones.
It doesn’t need to be perfect. It needs to exist. Spend an hour on it and move on.
How to Connect Printify to Your Etsy Shop
Step 5 — Create Your Printify Account
Go to Printify and create a free account. Three minutes — email, password, done. No card required at this stage.
Once you’re in the Printify dashboard, you’ll see the option to connect a sales channel. That’s what the next step covers.
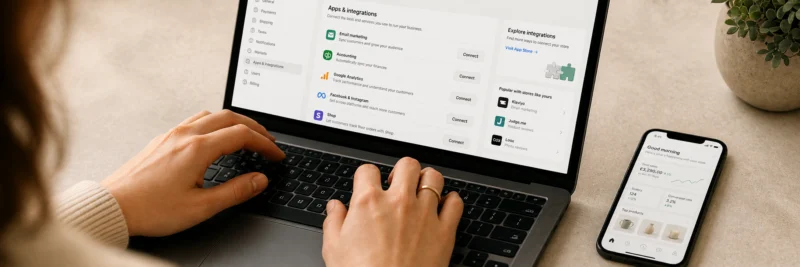
Step 6 — Connect Printify to Etsy
In your Printify dashboard, go to “My Stores” and select “Add a new store.” Choose Etsy from the list of available integrations.
Printify will redirect you to Etsy to authorise the connection. Etsy will ask you to grant a set of permissions — grant all of them. If you restrict any permissions, the integration won’t work properly and your orders won’t fulfil automatically.
Once you’ve granted permissions, you’ll be redirected back to Printify and your Etsy shop will appear in “My Stores.” The connection is live.
How to Create and List Your First Product
This is where the setup becomes a shop. Take it one step at a time.
Step 7 — Choose Your Product and Supplier
In the Printify catalogue, browse to the product type you’ve decided to start with. You’ll see multiple suppliers offering the same product — read the reviews carefully before choosing one.
Look at the supplier’s average production time, their print quality rating, and where they’re based. For UK-based sellers targeting UK buyers, a UK supplier keeps shipping times short and costs low. For US-focused sellers, a US-based supplier makes the same difference.
Before you sell at volume, order a sample. Most Printify suppliers ship samples at base cost — a small investment that tells you a lot about print quality, packaging, and delivery time before your customers find out instead of you.
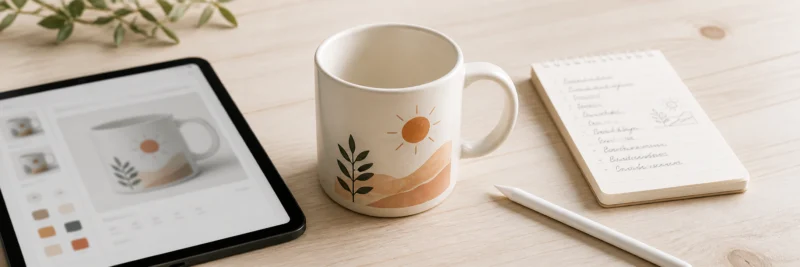
Step 8 — Create Your Design
Your design file needs to be a PNG at 300 DPI minimum. Printify’s product templates show you the exact dimensions required for each product — download the template, design to those dimensions, and export as a PNG.
For most beginners, Canva covers everything needed — text-based designs, simple illustrations, typographic layouts. The free version is enough for most POD design work. Set your Canva canvas to the exact pixel dimensions from the Printify template, design within those bounds, and export at the highest resolution available.
Once you’ve uploaded your design in Printify, use the built-in mockup generator to preview it on the product. Check the design is positioned correctly, the text is readable at the product’s actual size, and there are no unintentional white borders or cropping.
Step 9 — Create Your Mockup Images
This is the step that separates listings that convert from listings that don’t.
A flat design preview on a white background doesn’t sell products. A lifestyle mockup — your mug on a kitchen counter, your t-shirt being worn, your tote bag over a shoulder — gives the buyer a sense of what they’re actually getting. That context is what creates the “I want that” feeling.
Placeit generates lifestyle mockups from your design file in minutes. Upload your design, choose a mockup template that fits your product and target audience, and download the finished image. Aim for five to eight mockup images per listing — Etsy allows up to ten, and listings with more images consistently outperform those with fewer.
Step 10 — Write Your Listing
A strong Etsy listing has three components — and most beginners get at least one of them wrong.
Title: Write it to match how buyers actually search, not how you’d describe the product. “Funny Dachshund Mug — Gift for Sausage Dog Lovers — Dachshund Owner Gift” is a strong title. “Cute Dog Mug” is not. Put the most important keywords near the front — Etsy’s algorithm weights the beginning of the title more heavily.
Description: Write for the buyer, not the product. Answer the questions they’re likely to have — what’s it made of, what are the dimensions, how long does shipping take, is it dishwasher safe. Include your keywords naturally throughout — Etsy reads descriptions as well as titles and tags.
Tags: You get 13 tags per listing — use all of them. Mix broad search terms with specific ones and think about how different buyers might search for the same product. Cover as many angles as possible.
For a broader walkthrough on selling on Etsy beyond print on demand, the how to sell digital products on Etsy post covers the platform in more depth.
Step 11 — Set Your Price
Most beginners undercharge here — and it’s worth spending five minutes on the numbers before you publish.
Take your base cost — what Printify charges to produce and ship the product. Add Etsy’s fees: £0.18 listing fee, 6.5% transaction fee on the sale price, and roughly 4% payment processing. Then add your target margin.
A concrete example with a mug:
- Base cost including shipping: £9.00
- Etsy listing fee: £0.18
- 6.5% transaction fee on a £19 sale: £1.24
- Payment processing (~4%): £0.76
- Total costs: £11.18
- Your margin at £19: £7.82
At £14, that margin drops to £2.82. Price for margin, not for competitiveness. Underpricing is one of the most common mistakes new POD sellers make — and one of the hardest to walk back once buyers expect a certain price point.
Step 12 — Publish Your Listing
Before you hit publish, run a final check:
- Preview the listing and confirm mockup images are displaying correctly
- Check that Printify shows this product as connected to your Etsy shop
- Confirm your shipping profiles are set up in Etsy — if they’re not, buyers won’t be able to check out
Then publish. Your first listing is live.
How to Get Your First Sales on Etsy

Listing and waiting is not a strategy. Here’s what actually moves the needle for a new shop.
Get your Etsy SEO right from day one. The keywords in your titles, tags, and descriptions determine whether Etsy shows your products to buyers. Spend time on this before you publish — it’s much harder to correct once a listing has been live for weeks.
Use Pinterest. It’s the highest-leverage external traffic source for most POD sellers — particularly for visual products like home goods, apparel, and wall art. The how to market printables on Pinterest post covers the Pinterest traffic strategy in detail — the same principles apply directly to POD products.
List more products. Five listings is not enough surface area to get found consistently on Etsy. Aim for 20–30 products before you expect reliable traffic. Each listing is another entry point into Etsy’s search results.
If you want a structured approach from someone who has built an $800k POD shop on Etsy, the Gifting Gold free workshop from Gold City Ventures is worth an hour of your time. Emily walks through her approach to product selection, shop setup, and getting found on Etsy — all free.
Download Your Free Print on Demand Starter Checklist
The two-page checklist that takes you from ‘no idea where to start’ to your first live listing — yours the second you sign up.
Common Etsy POD Setup Mistakes to Avoid
A few things that cost beginners their first sales — worth knowing before you publish anything.
Skipping the shop profile. An empty banner, no About section, and missing policies tell buyers the shop might not be trustworthy. Etsy’s algorithm notices too. Complete the profile before you list anything.
Publishing without lifestyle mockups. A flat design on a white background is not enough. If your first image isn’t a lifestyle mockup showing the product in context, your listing is working against itself from the first click.
Underpricing. Run the numbers before you set a price. Etsy’s fees add up faster than most beginners expect, and a price that looks reasonable before fees can leave almost nothing after them.
Listing too few products and giving up. Most new shops see very little traffic in the first 60–90 days. That’s not failure — that’s Etsy’s algorithm learning who your products are for. Keep listing. The shops that get traction are the ones that stayed consistent when nothing seemed to be happening.
Ready to Get Your First Listing Live?
The setup is more straightforward than it looks written out. Work through it one step at a time and you’ll have your first product live today.
Create your free Printify account and start from Step 5 if your Etsy shop is already set up — or from Step 1 if you’re starting from scratch. Either way, the first listing is closer than it feels right now.
If you want the full picture on print on demand before you dive in, the print on demand side hustle guide covers everything from how the model works to what to expect in the first few months.