
Table of Contents
This post contains affiliate links. If you click through and buy something, I may earn a small commission — at no extra cost to you. I only recommend tools I’ve actually used or thoroughly researched.
The number one thing that stops people from starting print on demand isn’t the platform setup or the Etsy fees or the niche decision. It’s the design. Specifically, the belief that you need to be a graphic designer to create products worth selling.
You don’t. And this post is going to prove it.
The most successful POD shops aren’t built on complex, technically impressive illustrations. They’re built on simple, targeted designs that say exactly the right thing to exactly the right person. A well-chosen phrase in the right font on the right product will outsell a beautifully illustrated design aimed at nobody every single time.
Here’s how to create your first print on demand designs today — no design experience, no expensive software, no art degree required.
You Don’t Need to Be a Designer to Sell Print on Demand
Worth saying clearly before anything else — because the design barrier stops more people than any other part of the process.
The designs that sell best on Etsy are not the most technically complex ones. They’re the most relevant ones. A mug that says exactly the right thing to a night shift nurse — in a clean, readable font with no other embellishment — will consistently outsell an elaborate illustrated mug aimed at “people who like coffee.”
What makes a POD design sell is how well it speaks to a specific person in a specific niche. That’s a question of understanding your audience, not of illustration skill.
If you haven’t chosen your niche yet, the best niches for print on demand post covers ten profitable options with honest notes on what makes each one work. The niche decision comes before the design decision — always.
The 5 Types of Print on Demand Designs That Actually Sell
Before you open any design tool, it helps to know which styles work commercially — and which ones require skills most beginners don’t have yet. Here are the five approaches worth starting with.
1. Text-Based Designs
The most accessible and often most profitable design style in print on demand. A well-chosen phrase, slogan, or niche-specific observation in the right font, on the right product, aimed at the right person. That’s the whole formula.
Design skill required: minimal. If you can type and choose a font, you can create a text-based design.
The words do the work here, not the visuals. “I’d rather be hiking” on a t-shirt for a trail running niche. “Introverted but willing to discuss dogs” on a mug for the introvert-dog-owner crossover. The key is specificity — generic phrases that could apply to anyone don’t sell. Phrases that make one specific type of person feel immediately seen do.
2. Simple Illustrated Graphics
A clean, minimal illustration combined with text. Not complex artwork — a simple breed-specific silhouette, a small botanical element, a minimal icon — paired with a niche-specific phrase. Achievable in Canva using the built-in elements library without any advanced skills.
A simple dachshund silhouette above “sausage dog mum” on a mug. A small mountain range below “adventure awaits” on a water bottle. The illustration adds personality without requiring you to draw anything from scratch.
3. Quote and Sentiment Designs
A meaningful quote, a funny observation, or a niche-specific sentiment in a clean typographic layout. Works particularly well for mental health, family roles, and profession niches — anywhere the words carry genuine emotional weight.
“Teaching: the profession that makes all other professions possible” in a clean serif font on a framed print. A sobriety milestone date on a minimal typographic mug. The emotional response is what drives both the self-purchase and the gifting decision — someone sees it and thinks “that’s exactly right” or “that’s exactly what my friend needs.”
4. Pattern and Repeat Designs
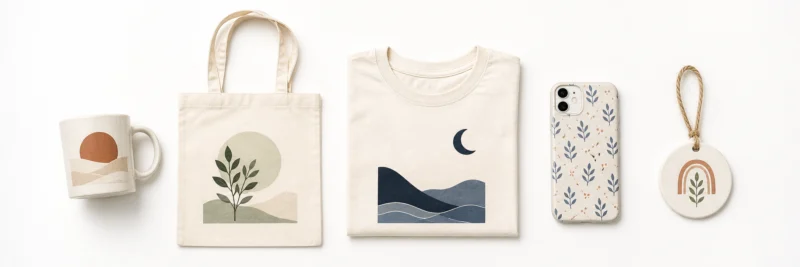
A single simple element — a breed silhouette, a small icon, a leaf shape — repeated across the product surface to create a pattern. Works particularly well on tote bags, phone cases, and cushions.
Design skill required: low. Create or find one element in Canva’s library and tile it. The result looks intentional and considered without requiring complex design work. A tote bag covered in small cat silhouettes. A phone case with a repeat pattern of tiny dachshunds. The visual appeal comes from the repetition, not from intricate artwork.
5. Personalisation-Ready Designs
A design template with a space for a name, date, or custom phrase — the buyer adds the personal element at purchase. Works particularly well on ornaments, mugs, and milestone products.
“Best [role] ever — [name]” on a Christmas ornament. “[Name]’s kitchen” on a ceramic tile. The personalisation element transforms a standard product into something that feels made specifically for one person — which dramatically increases both perceived value and gifting appeal.
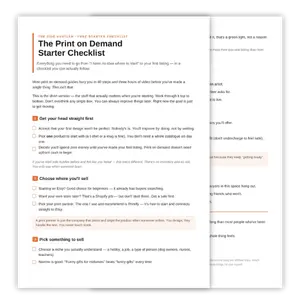
Download Your Free Print on Demand Starter Checklist
The two-page checklist that takes you from ‘no idea where to start’ to your first live listing — yours the second you sign up.
The Tools You Actually Need
Three tools. Everything else is optional.
Canva — for Design Creation
Canva is where most print on demand designers start — and plenty never feel the need to go beyond it. The free version includes thousands of fonts, a large element library, and the canvas size controls you need to design to exact product dimensions. Browser-based, no software to install, and the learning curve is genuinely shallow.
Canva Pro adds a larger element library, background remover, and a few other features useful at volume — but the free plan is more than enough to get started and create your first dozen products.
For a more detailed walkthrough of using Canva for POD products specifically, the Canva for print on demand post covers it in depth.
Printify — for Uploading and Previewing
Once your design file is ready, Printify is where you upload it and preview it on the actual product. The built-in mockup generator shows you exactly what your design will look like — positioned, scaled, on the real product surface — before you publish anything.
This matters more than most beginners realise. A design that looks great in Canva can look completely different once it’s placed on a curved mug surface or scaled down to a small phone case. Always preview in Printify before publishing.
Placeit — for Lifestyle Mockups
Once your design is live on a product, Placeit generates lifestyle mockup images — your mug in a real kitchen, your t-shirt being worn, your tote bag over a shoulder. These are the images that go into your Etsy listing and make the difference between a listing that converts and one that doesn’t. Placeit generates them from your design file in minutes.
How to Create Your First Print on Demand Design in Canva: Step by Step
Here’s the process from blank screen to upload-ready file.
Step 1 — Get the Right Canvas Size from Printify
Before you open Canva, go into Printify and find the specific product you’re designing for. Every product has a downloadable design template showing the exact pixel dimensions, the print area, and any safe zones.
Download that template. In Canva, click “Create a design” → “Custom size” → enter the exact pixel dimensions from the template. Not a generic size, not a rough approximation — the exact dimensions. This is the canvas you’ll design on.
Step 2 — Choose Your Design Style
Based on the five styles above, pick the one that fits your niche and your current skill level. If this is your first design, start with text-based. One strong phrase, one or two fonts, clean layout. Resist the urge to make it complicated.
A simple design executed cleanly will always outperform a complex design executed badly. And for most beginners, “complex” means too many elements, too many fonts, and no clear visual hierarchy.
Step 3 — Choose Your Fonts Carefully
Fonts carry more personality than most beginners expect. Serif fonts feel classic and established. Sans-serif fonts feel clean and modern. Script fonts feel personal and handwritten — but only work well at large sizes where they remain readable.
Two rules worth following until you have more experience. Use a maximum of two fonts per design — one for the headline, one for supporting text. And never use a decorative or script font for small text — beautiful at large sizes, unreadable at small ones.
Step 4 — Keep It Simple
The hardest instruction to follow and the most important one.
The most common beginner mistake in POD design is adding too much — too many elements, too many colours, too much going on. The designs that sell best can usually be described in one sentence. One message, one visual direction, one clear hierarchy.
If you find yourself adding a third element, stop and ask whether the design would be stronger without it. Usually the answer is yes.
Step 5 — Check the Technical Requirements
Before exporting, check three things.
Format: PNG is standard for most POD products. It supports transparent backgrounds, which most products require so the design sits cleanly on the surface without a white box around it.
Transparent background: Delete the background layer before exporting, or set it to transparent in Canva’s settings. In the export options, choose PNG and tick “transparent background.”
Resolution: Export at the highest resolution available — look for the high quality export option in Canva. A low-resolution file produces a blurry print, and blurry prints lead to negative reviews.
Step 6 — Upload to Printify and Preview
Upload your PNG to Printify via the product editor. Position it correctly within the print area — centred, at the right scale, with adequate margin from the edges.
Then preview it on the actual product. Check the design is centred as expected, text is readable at product size, nothing is getting cut off at the edges, and the design looks proportionate rather than too small or too large.
Fix any issues at this stage. Getting the placement right now saves you from negative reviews later.
What Makes a POD Design Actually Sell

The technical process produces a valid design file. What makes it sell is something slightly different.
Relevance. Does this design speak directly to one specific person in one specific niche? The more targeted, the more likely the right person is to see it and feel like it was made for them. A design that could appeal to anyone will struggle to appeal to anyone strongly enough to buy.
Readability. Shrink your Canva preview to thumbnail size and look at it. If anything is unclear at that size, it won’t convert in an Etsy search result where products appear small. Test this before you publish, not after.
Emotional response. Does the design make the target buyer feel something — seen, amused, understood, proud? That emotional response is the trigger for both self-purchase and gifting. If you look at your design and feel nothing, the buyer probably will too.
For the income strategy behind all of this, the how to make money with print on demand post covers what separates the shops that earn from the ones that don’t.
Common Design Mistakes to Avoid
Four things that cost beginners sales before a listing even goes live.
Too many elements. Cluttered designs don’t translate well to products. Every element you add makes the design harder to read and less impactful. When in doubt, remove something.
Ignoring the template dimensions. Designing to a generic size and squeezing it into Printify’s template is a reliable way to end up with poorly positioned prints. Always design to the exact dimensions from the product template first.
Script fonts for small text. They look beautiful in previews and illegible on products. If text will appear small on the finished product, use a clean readable font instead.
Designing for yourself instead of your niche. Your personal taste is not the filter. The question is whether the person you’re designing for would feel something when they see it — not whether you would.
Ready to Create Your First Design?
The design barrier is smaller than it feels. A text-based design in the right font, saying the right thing to the right niche — that’s a real, sellable product. And you can create it in Canva in an afternoon.
Open Canva, set your canvas to the dimensions from your Printify product template, and start with one design. Keep it simple, keep it niche-specific, and get it uploaded.
Once it’s in Printify and ready to list, the print on demand on Etsy guide covers the full listing process — from writing a strong title to choosing the right mockup images.
Haven’t set up your Printify account yet? It’s free and takes about three minutes — start there and come back to the design step once you’re connected.