
Table of Contents

This post contains affiliate links. If you click through and buy something, I may earn a small commission — at no extra cost to you. I only recommend tools I’ve actually used or thoroughly researched.
If you’re learning how to make printables in Canva, you’ve picked the right tool. Canva is what the vast majority of printable sellers use — from people just listing their first product to sellers with thousands of sales. It’s free, it runs in your browser, and you can go from zero experience to a finished, sellable printable in a single afternoon.
I’m not going to pretend this is complicated. It really isn’t. If you can drag and drop, you can use Canva. The trick isn’t learning the tool — it’s knowing what to create and how to create it in a way buyers want to purchase.
This post walks you through the entire process, step by step. By the end, you’ll have a printable ready to list and sell.
Recommended reading: If you haven’t decided what to create yet, start with How to Make Printables to Sell — that covers the research and planning side before you open Canva.
What You Need Before You Start
A free Canva account. Head to Canva and sign up. The free version has everything you need to get started. Canva Pro (around $15/month, or $120/year if you pay annually) adds features like background removal, brand kits, and access to premium templates and elements — but you don’t need it on day one.
A product idea. You should already know what you’re going to create before opening Canva. A monthly budget planner, a habit tracker, a piece of wall art, a wedding invitation template — whatever it is, have it clear in your head first.
Recommended reading: Printables to Sell on Etsy — 10 product ideas that are selling right now if you need inspiration.
How to Make Printables in Canva: Step by Step
Step 1: Create a Custom-Sized Document
Don’t start with a random Canva template from the homepage. Start by setting the right document size for your printable.
Click “Create a design” in the top right corner, then choose “Custom size.”
For most printables, you’ll use one of these:
US Letter: 8.5 x 11 inches — the standard for planners, trackers, worksheets, checklists, and most printables sold to US buyers.
A4: 8.27 x 11.69 inches — for international buyers. Some sellers offer both sizes as a bundle, which is a nice touch.
Wall art sizes: 8 x 10, 11 x 14, or 16 x 20 inches — these match the most common frame sizes.
Make sure you select “inches” as your unit (not pixels or centimeters) before entering the dimensions. Getting the size right from the start saves you from having to resize later, which almost always messes up your layout.
Step 2: Set Up Your Brand Elements
Before you start designing, take five minutes to choose your fonts and colors. This sounds like a small thing, but it’s one of the biggest differences between printables that look professional and ones that look like a school project.
Fonts: Pick two. One for headings and one for body text. Keep them clean and easy to read — especially for printables that will be printed on paper. Script fonts look pretty on screen but can be hard to read at smaller sizes. Good combinations include a bold sans-serif heading (like Montserrat or Raleway) with a clean body font (like Open Sans or Lato).
Colors: Choose 3–4 colors and stick to them. Use one as your primary color, one as an accent, and one or two neutrals. Consistency across all your products builds brand recognition — when a buyer sees five of your listings and they all look like they belong together, it creates trust.
If you’re not sure where to start with colors, look at the top-selling shops in your niche. You’re not copying their exact palette — you’re understanding what the buyers in that space respond to. Canva also has a “Styles” section with pre-built color palettes that work well together.
Step 3: Use a Template (Or Start From Scratch)
Canva has thousands of templates designed specifically for planners, trackers, calendars, worksheets, and more. Search for your product type in the template library and you’ll find dozens of starting points.
Using a template is fine — and it’s the fastest way to get started. Just make sure you customize it enough that your product looks distinct. Change the colors, swap the fonts, rearrange the layout, and add your own content. A template you’ve truly made your own is a product. A template you’ve barely changed is someone else’s design with your name on it.
If you’d rather start from a blank page, that works too. Some sellers prefer it because they want complete control over the layout. Either approach gets you to the same place — a finished product.
Step 4: Design Your Printable
This is where you spend most of your time. Here are the practical things that matter:
Layout and structure. Think about how the buyer will use this. A budget tracker needs clearly labeled sections, logical flow, and enough space to write in. A planner needs clean grid lines and room for real-world handwriting — not tiny boxes that only work on a screen.
White space. Don’t fill every inch. Cluttered printables feel overwhelming and look unprofessional. Give every element room to breathe. Some of the best-selling printables on Etsy are surprisingly simple.
Print margins. Most home printers can’t print right to the edge. Keep all important content at least 0.25 inches from the edges of your document. You can add guide lines in Canva to help with this — go to File > Show rulers and guides.
Text readability. If your printable includes text, make sure it’s large enough to read when printed. Body text should be at least 10–12 points. Headings can be larger, but don’t go overboard — you want clean and readable, not shouty.
Elements and graphics. Canva’s free library has icons, shapes, lines, and illustrations you can use. Stick to a consistent style — don’t mix cartoon icons with minimalist line art in the same product. And always check that the elements you use are available for commercial use (most Canva free elements are, but it’s worth confirming).
Step 5: Add Multiple Pages (If Needed)
If your printable has multiple pages — a monthly planner with 12 month sheets, a worksheet set, or a multi-page journal — you can add pages within the same Canva design. Click the “+” button below your current page to add a new one.
Keep the design consistent across all pages. Same fonts, same colors, same general layout structure. The product should feel cohesive from start to finish.
Step 6: Export Your File

When your design is finished, click “Share” in the top right corner, then “Download.”
For most printables: Choose “PDF Print.” This gives you the highest quality output and preserves your layout exactly as you designed it. This is what buyers expect when they purchase a printable.
For wall art: You can also export as PNG for a high-resolution image file. Some buyers prefer this for printing at larger sizes.
For multi-page designs: Make sure “All pages” is selected before downloading. Buyers expect one clean PDF file, not a separate file for each page.
The file that downloads to your computer is exactly what your customers will receive. Open it, check that everything looks right, and if possible, print a test copy at home to make sure the colors, text, and layout all look good on paper.
Step 7: Create Mockup Images
Your mockup images are what buyers see first in Etsy search results. They’re the difference between someone scrolling past your listing and someone clicking on it.
A mockup shows your printable “in use” — a planner open on a desk with a pen next to it, wall art displayed in a frame in a styled room, a checklist on a clipboard. These images help buyers picture your product in their life.
Canva has built-in mockup frames you can use. Search “mockup” in the Elements panel and you’ll find frames for laptops, tablets, picture frames, and flat lay scenes. Drop your design into the frame and you’ve got a professional-looking product image.
You can also find free mockup generators online, or buy mockup template bundles on Etsy itself.
Create at least 3–4 mockup images per listing. Show the product from different angles, zoomed in on the details, and in context. The more a buyer can see and understand what they’re getting, the more likely they are to purchase.
Canva Free vs. Canva Pro: Do You Need to Upgrade?

For your first few products, no. The free version of Canva has everything you need — templates, fonts, elements, export options, and mockup frames.
Canva Pro becomes worth it when you’re creating regularly and want access to premium templates and elements, the brand kit feature (saves your fonts and colors for quick access), background removal, and the ability to resize designs to different dimensions with one click. At around $15 a month — or $120 a year if you pay annually — it pays for itself quickly if you’re actively building a shop.
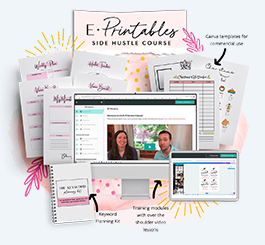
If you’re building a serious printables business and want structured guidance on going from Canva to consistent Etsy sales, the Gold City Ventures E-Printables Course is worth a look — it covers the Canva-to-Etsy workflow in detail.
Recommended reading: Make Money With Canva — printables are just one of several ways you can earn with this tool.
Free Training: Earn Money Selling Digital Printables
Not sure what to create or where to start? Gold City Ventures’ free workshop walks you through what sells, how to design it, and how to get your first sale
What to Do After Your Design Is Done
Once you’ve got your finished file and your mockup images, you’re ready to list and sell on Etsy.
Once your file is exported and ready, the next step is listing it. Follow the full shop setup process in How to Sell Printables on Etsy. And before you decide what to charge, read How to Price Printables on Etsy — pricing is one of the most common places beginners leave money on the table.
And if you want structured training that walks you through all of this — including 30+ done-for-you Canva templates you can customize and sell immediately — the Gold City Ventures E-Printables Course is built specifically for this. Their free workshop is a good first step if you want to understand the business model before committing.
Start With One. Just One.
Don’t try to create a 50-page planner system as your first product. Make one single-page printable — a budget tracker, a habit tracker, a piece of wall art. Export it, create your mockups, and list it on Etsy.
You’ll learn more from creating and listing one product than you will from watching ten tutorials. And once you’ve done it once, the second one takes half the time.
You’ve got this.