
Table of Contents
This post contains affiliate links. If you click through and buy something, I may earn a small commission — at no extra cost to you. I only recommend tools I’ve actually used or thoroughly researched.
If you’re learning how to make printables to sell, here’s the good news: you don’t need to be a designer. You don’t need Photoshop. You don’t need a degree in anything creative. The vast majority of successful printable sellers started with zero design experience and a free Canva account.
I know that because I’ve spent months researching this space — studying the shops that are making sales, reading the reviews, and pulling apart what makes a printable sell versus one that sits there collecting dust. The pattern is always the same: the products that do well aren’t the prettiest. They’re the most useful.
In this post, I’ll walk you through the full process of creating a printable from scratch — from picking the right idea to designing it, formatting it properly, and exporting a file that’s ready to list and sell.
Recommended reading: If you want the big picture of selling printables as a business (not just making them), start with How to Sell Printables Online.
Free Training: Earn Money Selling Digital Printables
Not sure what to create or where to start? Gold City Ventures’ free workshop walks you through what sells, how to design it, and how to get your first sale
Start With Research, Not Design
If you open Canva before you’ve confirmed people are buying what you’re about to make, you’re doing this in the wrong order.
Research comes first. Always. The printables that sell aren’t the most creative ones or the prettiest ones — they’re the ones that solve a specific problem for a specific buyer who’s already looking for that exact thing on Etsy.
The manual way to do this is to go to Etsy and search your product idea. Look at the top listings. Check the sales counts. Read the reviews. See if multiple shops are successfully selling similar products. If they are, there’s a market. That approach works — but it’s based on what you can see on the surface, not the data underneath.
A faster approach is to use Profittree. It’s an Etsy product research tool that shows you demand signals from real Etsy activity — estimated views, add-to-carts, and sales — rather than just keyword volume or trend lines. The numbers are estimates, not Etsy’s exact internal data, so treat them as a strong guide rather than gospel, but they’ll tell you far more than guessing will.
Before I design anything new, I’d run the product idea through Profittree’s Product Finder. If the data shows consistent demand, that’s my green light to open Canva. If it doesn’t, I save myself the hours and go back to the research phase. Want the full breakdown of what Profittree does and which plan is right for you? Read my Profittree review. There’s a free plan that includes the Product Finder — start here and check your idea before you commit to it.
Once your research confirms there’s demand, then you design. And because you know what buyers are already responding to, you’re not designing blind — you’re creating something with a real chance of selling from day one.
Recommended reading: Best Printables to Sell for Beginners — if you’re still deciding what to research first, start here.
Recommended reading: Printables to Sell on Etsy — 10 product ideas backed by what’s selling right now.
Choose Your Tool
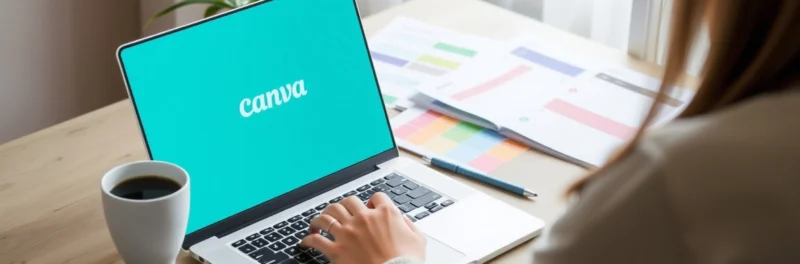
For most people, the answer here is simple: Canva.
Canva is free, runs in your browser, and uses a drag-and-drop interface that anyone can figure out in about 20 minutes. It has thousands of templates for planners, trackers, wall art, worksheets, invitations, and just about anything else you’d want to create. You’re not starting from a blank page — you’re starting from a professionally designed template and making it your own.
The free version of Canva is enough to get started. Canva Pro (around $15/month) adds useful features like background removal, premium templates, and brand kit tools, but you don’t need it on day one.
Other tools people use include Adobe Illustrator (powerful but expensive and a steep learning curve), Affinity Designer (one-time purchase, solid alternative to Illustrator), and even Google Slides for very simple layouts. But if you want to design printables for Etsy without a steep learning curve, Canva is where I’d start — and where most successful sellers stay.
Recommended reading: How to Make Printables in Canva — a detailed step-by-step tutorial that walks you through the entire Canva process.
How to Make Printables to Sell: The Actual Process
Step 1: Set Up Your Document
Open Canva and create a custom-sized design. For most printables, you’ll use one of two sizes:
US Letter — 8.5 x 11 inches. This is the standard for planners, trackers, worksheets, and most printables sold to US buyers.
A4 — 8.27 x 11.69 inches. Use this if you’re targeting international buyers, or offer both sizes as a bundle.
For wall art, you might use different dimensions — 8×10, 11×14, or 16×20 are the most popular frame sizes.
Set your document to the right size before you start designing. Resizing after the fact almost always messes up the layout.
Step 2: Pick Your Fonts and Colors
This sounds small, but it’s one of the biggest differences between a printable that looks professional and one that looks like a school project.
Fonts: Stick to two. One for headings and one for body text. Keep them clean and readable — remember, many of these will be printed on paper, and fancy script fonts can be hard to read at smaller sizes. Canva has hundreds of free fonts built in.
Colors: Pick 3–4 colors and stick to them across all your products. This does two things: it makes each individual product look polished, and it builds brand consistency across your shop. When a buyer sees five of your products and they all look like they belong together, that’s trust.
A good starting point is to look at the color palettes of the top-selling shops in your niche. You’re not copying their exact colors — you’re understanding what the buyers in that category respond to.
Step 3: Design With the Buyer in Mind
Here’s where most people go wrong. They focus on making something that looks beautiful and forget to make something that’s useful.
The printables that sell best solve a specific problem. A budget tracker needs to help someone track their budget — clearly labeled sections, enough space to write in, logical flow from top to bottom. A weekly planner needs the right balance of structure and flexibility.
Before you start dragging elements around, ask yourself: “If I printed this out and tried to use it, would it actually work?” If the answer is no, redesign it.
A few practical design tips:
Leave enough white space. Cluttered printables feel overwhelming and look cheap. Give every element room to breathe. Good printable design for beginners is less about adding more — it’s about knowing what to leave out.
Think about print margins. Most home printers can’t print right to the edge of the paper, so keep important content at least 0.25 inches away from all edges.
Test it yourself. Print your design at home before listing it. Does it look as good on paper as it does on screen? Is the text large enough to read? Are the lines thick enough to show up clearly? This simple step catches problems you’d never notice on a screen.
Step 4: Export Your File
For most printables, export as a PDF — it’s the universal standard and preserves your layout exactly as you designed it. In Canva, choose “PDF Print” for the highest quality.
For wall art, you might also offer a PNG or JPEG version, especially if buyers might want to use it as a digital wallpaper or print it at different sizes. If you’re planning to create digital downloads to sell beyond just printables — things like social media templates or digital planners — PNG is often the better format for those.
If your printable has multiple pages (a monthly planner, a full worksheet set), export them all as a single PDF file. Buyers expect one clean download, not a folder full of separate files.
Name your file clearly. Something like “Monthly-Budget-Planner-US-Letter.pdf” tells the buyer exactly what they’re getting. Avoid names like “final_v3_FINAL.pdf” — it looks sloppy and doesn’t inspire confidence.
Step 5: Create Mockups
This is the step that turns a decent listing into a great one.
A mockup is an image that shows your printable “in use” — a planner open on a desk with a pen next to it, wall art displayed in a frame in a styled room, a checklist clipped to a clipboard. These images help buyers imagine your product in their life, and they convert much better than flat screenshots.
You can create mockups for free in Canva using their frames and mockup templates. There are also free mockup generators online, or you can buy mockup bundles on Etsy itself (which is a nice bit of irony).
Your mockup images are what buyers see first when your listing appears in search results. Make them count.
Common Beginner Mistakes to Avoid
Making it too complicated. Your first printable doesn’t need to be a 30-page planner system. Start with something simple — a single-page budget tracker, a weekly meal planner, a set of wall art prints. You can always create more complex products later once you know what your audience wants.
Ignoring what’s already selling. Creating products based on what you think is cool, rather than what the market is looking for, is the fastest way to build a shop nobody visits. Research first, create second.
Skipping the test print. What looks perfect on your screen might print with cut-off edges, tiny text, or colors that look completely different on paper. Always print at least one copy before listing.
Using fonts or elements you don’t have a commercial license for. Canva’s free elements are generally safe for commercial use, but always check. If you use fonts or graphics from other sources, make sure the license allows you to sell products made with them.
What About Using AI to Create Printables?
It’s a fair question, and it’s worth addressing because it comes up a lot.
Yes, you can use AI tools to help with parts of the process. ChatGPT is great for brainstorming product ideas, writing listing descriptions, or coming up with text content for planners and worksheets. AI image generators can help create backgrounds or decorative elements.
But there’s a catch. Etsy requires sellers to disclose in the listing description when an item was created with the help of AI — and that applies even to AI-generated images or backgrounds, not just text. Skip it and you risk reduced visibility or having the listing removed. On top of that, buyers in 2026 are increasingly savvy — fully AI-generated products that look generic tend to get lower reviews and fewer repeat customers. The best approach is to use AI as a tool to speed up parts of your workflow, not as a replacement for your own creative input.
What to Do After Your First Printable Is Done
Once you’ve got a finished product, the next step is getting it in front of buyers.
Recommended reading: How to Sell Printables on Etsy — the step-by-step process for setting up your shop, creating listings, and getting your first sales.
Recommended reading: How to Price Printables on Etsy — don’t guess on pricing. There’s a method to it.
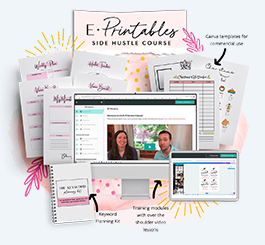
And if you want a structured path through all of this — from choosing your niche to designing your products to listing and selling them — the Gold City Ventures E-Printables Course walks you through it step by step. It includes 30+ Canva templates you can customize and sell immediately — a genuine shortcut past the “staring at a blank Canva page” phase. I’d start with their free workshop first, and only move up to the paid course if you decide you want the full structured path.
Recommended reading: Gold City Ventures Review — my full breakdown of what’s inside and who it’s best for.
Free Training: Earn Money Selling Digital Printables
Not sure what to create or where to start? Gold City Ventures’ free workshop walks you through what sells, how to design it, and how to get your first sale
Start Simple. Start Now.
The best printable you’ll ever make is your second one. Because your first one will teach you more about what buyers want, how Canva works, and what “good enough to list” actually looks like than any amount of research ever could.
Don’t wait until you feel ready. Open Canva, pick a template, and make something. It won’t be perfect. It doesn’t need to be. It just needs to exist.
You’ve got this.