
Table of Contents
This post contains affiliate links. If you click through and buy something, I may earn a small commission — at no extra cost to you. I only recommend tools I’ve actually used or thoroughly researched.
If you’re using Pinterest to drive traffic to your blog, a personal account won’t cut it. You need a Pinterest business account, and the good news is it takes about ten minutes to set up and costs nothing.
The difference isn’t just cosmetic. A business account unlocks Pinterest Analytics, gives you rich pins, and tells Pinterest you’re serious about your content — which matters for how your pins get distributed.
I set mine up by converting my old personal account, and I’ll walk you through that route and the start-from-scratch one. We’ll cover the profile, claiming your website, rich pins, and your first boards. Get this right once and you won’t need to touch it again.
Recommended reading: Pinterest for Bloggers: How to Get Free Traffic in 2026
Free Pinterest Training Workshop
Content ideas are only useful if your Pinterest strategy is solid enough to make them work. Meagan Williamson’s free workshop — The Discovery Loop — covers the full system so your content actually gets found.
Why You Need a Pinterest Business Account
Before we get into the how, it’s worth being clear on what you get with a business account that you don’t get with a personal one.
Pinterest Analytics. This is the big one. Without a business account, you’re flying blind. Analytics show you which pins are getting clicks, which boards are driving traffic, and who your audience is. You need that data to improve.
Rich Pins. Rich pins pull details straight from your website — post titles, descriptions, and more — and show them alongside your pin. They look more professional and tend to perform better in search.
Website verification. Claiming your website links your domain to your account, and Pinterest gives more visibility to pins from verified domains. If you’re serious about traffic, this isn’t optional.
Access to Pinterest ads. You might not want to run paid ads right now, but having the option is handy. You can’t run ads from a personal account at all.
And it’s free. There’s no real reason not to have one.
Option 1: Convert Your Existing Personal Account
If you already have a personal Pinterest account, you don’t need to start from scratch. You can convert it to a business account in a few clicks.
This is the route I took, and I’d recommend it if you’ve already got a personal account — converting was the easy option, and everything carried over without me losing a thing.
Here’s how:
- Log into your existing Pinterest account
- Click the dropdown arrow in the top right corner
- Select Settings
- Click Account management in the left sidebar
- Scroll down to Convert to business account
- Click Convert account and follow the prompts
Pinterest will ask a few questions about your business type and goals — just answer honestly. None of it changes your setup in any meaningful way.
Your existing boards, pins, and followers all carry over. Nothing gets lost.
Option 2: Create a Fresh Pinterest Business Account
If you don’t have a personal account, or you’d rather keep personal and business separate, you can create a new business account directly.
Here’s how:
- Go to pinterest.com/business/create/
- Enter your email address and create a password
- Enter your age and click Continue
- Fill in your business name — use your blog name or your own name, whichever you’re building your brand around
- Select your country and language
- Choose your business type — Blogger or Content Creator are the most relevant options
- Answer the setup questions about your goals and click Next
- You’ll land on your new business dashboard
That’s it. Your account is live.
How to Set Up Your Pinterest Business Profile Properly
Creating the account is just the start. How you set up your profile has a direct impact on how well Pinterest understands your content — and who it shows your pins to.
Choose the Right Profile Name
Use your blog name, your own name, or a mix of both — whatever you want people to search for and recognize you by.
Don’t stuff keywords into your name. Pinterest has cracked down on it and it looks unprofessional. “Lee | Side Hustle & Blogging Tips” is fine. “Pinterest Traffic Blog SEO Side Hustle Money Online” is not.
And don’t agonize over getting it perfect on day one. I’ve gone back and tweaked my own name and bio a couple of times since I set up, fine-tuning the keywords as I worked out what my readers actually search for. You can refine it whenever you like.
Write a Keyword-Rich Bio
Your bio is one of the most important SEO elements on your profile. Pinterest reads it to work out what your account is about.
Keep it clear and specific. Use the words your readers would actually type into the search bar.
A simple structure that works:
What you do + who you help + what they’ll get
For example: “Helping beginner bloggers build traffic and online income through Pinterest, blogging, and email marketing.”
That’s it. No need to be clever — just be clear.
Upload a Profile Photo
Use your face if you’re building a personal brand, or your logo if you’re going more brand-focused. Either works — just make sure it’s clear, high resolution, and recognizable at small sizes.
Avoid abstract images or stock photos. Pinterest runs on trust, and a real photo helps with that.
How to Claim Your Website on Pinterest
This is the step most beginners skip, and it’s one of the most important things you can do. Claiming my website was one of the first things I did when I set up, and I’d tell you to treat it the same way — a must, not a nice-to-have.
Claiming your website does two things. First, it verifies to Pinterest that you own the domain your content links to. Second, your profile photo then appears on every pin that links to your site — even pins other people save from your blog.
Pinterest prioritizes content from claimed domains in search results. That’s not a small thing.
How to Claim Your Website
- Go to Settings in your Pinterest business account
- Click Claim in the left sidebar
- Enter your website URL and click Claim
- Pinterest gives you two options: add an HTML tag to your site, or upload an HTML file
The easiest method for most bloggers is the HTML tag option:
- Copy the meta tag Pinterest gives you
- Paste it into the <head> section of your website
- If you’re on WordPress, you can do this through your theme’s header settings, or through a plugin like RankMath (which has a dedicated field for it)
- Once it’s added, go back to Pinterest and click Submit
Pinterest usually verifies within 24 hours, though it’s often much faster.
How to Set Up Rich Pins
Rich pins are worth turning on. They pull information straight from your website and show it on your pin — making your content look more complete and professional in search.
For bloggers, Article Rich Pins are the ones that matter. They display your blog post title, description, and author name alongside the pin image.
How to Enable Rich Pins
- Make sure your website has proper Open Graph or Schema markup — if you’re using Rank Math or Yoast SEO on WordPress, this is already handled for you
- Go to the Pinterest Rich Pins validator — Pinterest’s official tool for checking and applying for rich pins
- Enter the URL of one of your blog posts and click Validate
- If everything checks out, click Apply Now
Pinterest reviews the application and usually approves it within a few days. Once it’s approved, rich pins apply to all your existing and future pins automatically.
Setting Up Your First Boards
Before you start pinning, you need boards — and how you set them up matters.
Each board should cover one specific topic that’s relevant to your blog. Think of them like blog categories. The more focused each board is, the easier it is for Pinterest to match it with the right searchers.
For each board:
- Use a clear, keyword-rich title — “Side Hustle Ideas for Beginners,” not “Ideas I Like”
- Write a proper description — 2–3 sentences in natural language with relevant keywords
- Set the category — Pinterest uses this to classify your board, so pick the closest one
- Make it public — secret boards don’t show up in search
Aim for 10–15 boards before you start actively promoting your account, and put at least 10–15 pins in each before moving on.
Recommended reading: Pinterest Board Strategy
Pinterest Business Account Settings Worth Checking
Once your profile is set up, there are a few settings worth a look before you start pinning.
Notifications. Turn off anything that’s going to bury your inbox in noise. Keep the ones that tell you when someone saves your pins or follows you — those are useful signals.
Connected accounts. Pinterest lets you connect Instagram and other social accounts. It’s optional and makes little difference to your Pinterest results — skip it for now.
Data and privacy. Worth reading through, especially if you’re based in or writing for a European audience. Know what data Pinterest collects and how it’s used.
Ad account. Pinterest will nudge you to set up an ad account during setup. You don’t need to do that now — you can come back to it if you decide to run promoted pins later.
What to Do After Your Account Is Set Up
Setting up your business account is step one, not the whole strategy. Once you’re set up, here’s what comes next:
- Do your keyword research — before you make a single pin, understand how your audience searches on Pinterest
- Create your boards — 10–15 focused, keyword-rich boards to start
- Design your first pins — aim for 3–5 designs per blog post
- Start pinning consistently — 3–5 pins a day, every day
If you’d rather follow a proper step-by-step system than piece it together yourself, the course I’d point you to is Meagan Williamson’s Pinterest Beginners Course. I took it myself, and it’s what made the strategy side click for me — boards, keywords, the lot. She’s been on Pinterest since its early days in 2011 and teaches it as one joined-up system.
Full strategy guide: Pinterest Strategy for Beginners
Free Pinterest Training Workshop
Content ideas are only useful if your Pinterest strategy is solid enough to make them work. Meagan Williamson’s free workshop — The Discovery Loop — covers the full system so your content actually gets found.
Frequently Asked Questions
Is a Pinterest business account free?
Yes, completely free. There’s no paid tier for a business account — the only thing you pay for on Pinterest is advertising, which is entirely optional.
Can I have both a personal and a business account?
Yes. Pinterest allows you to have a personal account and a separate business account linked to the same email address. You can switch between them from the top right menu.
Will converting my personal account delete my existing pins and boards?
No. Everything carries over — your boards, your pins, your followers. Converting doesn’t delete anything.
Do I need a website to set up a Pinterest business account?
You don’t need one to create the account, but you do need one to claim your website and get the full benefit of a business profile. If you’re blogging, you should already have this covered.
How long does website verification take?
Usually a few hours, sometimes up to 24. Once it’s done you’ll see a tick next to your website URL in your profile settings.
Final Thoughts
Setting up a Pinterest business account properly takes about an hour if you do everything in this guide — the account, the profile, website verification, rich pins, and your first boards.
That hour is worth it. Get the foundation right and everything you do after it — your pins, your keyword research, your scheduling — builds on something solid.
So don’t rush it just to start pinning. Do it once, do it properly, and move on.
Next step: Pinterest Keyword Research
Account set up? Good — now here’s what to do with it. The free Pinterest Starter Checklist below lays out your first week in order, so you’re not guessing what comes after setup. Grab it and get started.
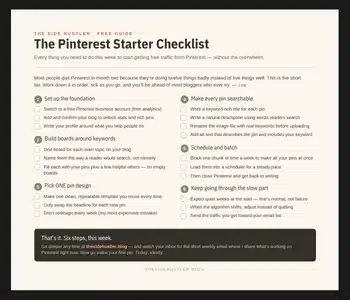
Download Your Free Pinterest Starter Checklist
Grab the free one-page checklist that shows you exactly what to do first, next, and after that.