
Table of Contents
This post contains affiliate links. If you click through and buy something, I may earn a small commission — at no extra cost to you. I only recommend tools I’ve actually used or thoroughly researched.
Pinterest for bloggers is the closest thing to free, lasting traffic I’ve found. It’s also slower than everyone makes it look — so this is the honest version, with what’s working for me and the mistakes that cost me months.
I started pinning the week my blog went live. I’d never touched Pinterest as a marketing tool before, so the first month was a bit of a fumble. But pins I made back then are still sending visitors to my site today, and I’m picking up new email subscribers every week from it. That’s the part that makes Pinterest worth the patience: the work compounds.
Here’s how I’d set it up if I were starting again — including the thing I wish I’d done on day one.
Why Pinterest for Bloggers Works When Social Media Doesn’t
Pinterest isn’t social media. It’s a search engine that happens to use pictures. People go there looking for something to do, make, buy, or try — which means they’re already in the mood to click through to a blog and read.
It’s also huge. Pinterest passed 631 million monthly active users in early 2026, with more than 80 billion searches a month. That’s a lot of people actively looking for ideas — not scrolling to kill time.
That changes everything about how you use it. You’re not chasing followers or going viral today. You’re creating pins that get found in search for months, the same way a blog post ranks on Google. A pin I made over a year ago still gets found, clicked, and read. Try getting that from an Instagram post.
It’s also the rare traffic source you can tap from day one. Google can take the better part of a year to trust a new blog. Pinterest will start sending you a trickle within weeks. A trickle, though — not a flood. But it builds.
If you don’t have the blog part sorted yet, start with my guide on how to start a blog first, then come back here.
Start Pinning on the Day Your Blog Goes Live
Don’t wait until you “understand Pinterest” to begin. You learn it by doing it, and the early pins you make are the ones quietly working for you a year from now.
I waited a little too long at the start because I felt like I had to master it first. That was backwards. The faster you start, the faster those early pins age into traffic.
Make your first few pins rough if you have to. You’ll improve fast, and nothing you publish is wasted — every pin is another fishing line in the water.
How to Structure Pinterest Boards Around Keywords (Not Personal Preference)
My first mistake was arranging my boards the way they made sense to me. Cute names, inside jokes, personal categories — a total mess. Nobody was searching for any of it, so none of it got found.
Boards are searchable on Pinterest, so name them the way your reader would type a search, not the way you’d label a folder. Here’s the difference:
- “Side Hustle Ideas for Beginners” — not “Money Stuff”
- “Etsy Printables to Sell” — not “Shop Things”
- “Work From Home Jobs” — not “The Dream”
- “Blogging Tips for New Bloggers” — not “My Blog Corner”
Start with five to ten boards, one for each main topic you write about, and put the keyword right at the front of the name. Then write a sentence or two in each board’s description using the same kind of search terms — Pinterest reads those too.
Then fill each board with your own pins plus a handful of helpful ones from other people in your niche. A board with one lonely pin on it doesn’t pull much. A focused, well-named board with twenty related pins tells Pinterest exactly what you’re about and who to show you to.
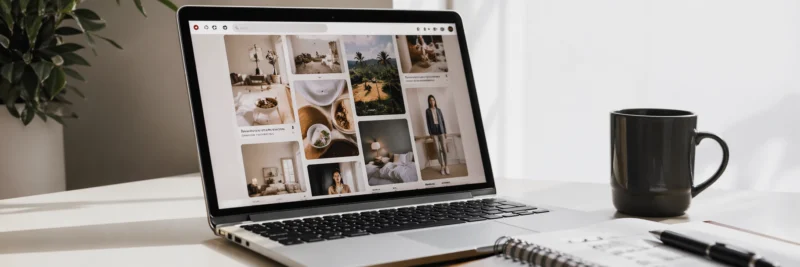
Pick One Pinterest Pin Design and Stick to It
This is the lesson that cost me the most time, so please learn it from me instead of the hard way.
Everyone tells you to be consistent on Pinterest. I was consistent — I pinned constantly. What I got wrong was the design. I changed my template almost every single time: new fonts, new layout, new colors, week after week. I thought variety was helping. It wasn’t.
The moment I settled on one clean, repeatable design, things started clicking. My pins started looking like they belonged to the same person, Pinterest got better at understanding them, and my results improved.
Here’s what “one design” actually means in practice. Lock these and don’t touch them:
- One font pairing — one for the headline, one for any smaller text
- One color palette that matches your blog
- The same layout, with the text in the same place every time
- Your blog name or web address in the same spot, so people start to recognize you
Then the only thing you change from pin to pin is the headline. That’s it. It feels boring. Boring is exactly what works here — it’s what makes your pins recognizable in a busy feed and easy for Pinterest to file.
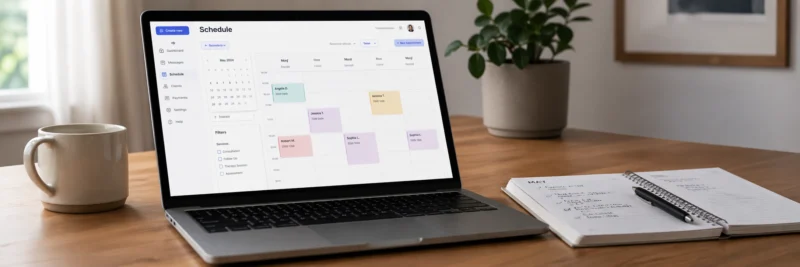
Use a Scheduler and Batch Your Pins Once a Week
I don’t sit on Pinterest every day, and you shouldn’t have to either. I block out one chunk of time a week, make a whole week’s worth of pins in one sitting, and load them into a scheduler. Then I forget about it until the next week.
Batching is the whole trick. Dropping into “pin mode” once a week is far less draining than pecking at it daily, and a scheduler drips your pins out at a steady pace while you get on with writing. Aim for a small, consistent number of fresh pins a day rather than dumping twenty at once and then going quiet for a week — Pinterest rewards showing up steadily, and a scheduler is what makes “steady” possible without it taking over your life.
The scheduler I use and recommend is Tailwind. It’s the one most Pinterest bloggers land on, it spaces your pins out for you, and it tells you decent times to post. It’s what makes the once-a-week batch system possible for me, and there’s a free plan to start on so you can try it before paying a penny.
If you’d rather start completely free, Buffer is a solid alternative. The free plan gives you ten scheduled slots at a time, but you can line up as many drafts as you like — you just have to remember to come back and schedule them. It’s a fair trade-off when you’re starting with no budget.
For more on timing and frequency, here’s how I schedule Pinterest pins in more detail.
Write SEO-Rich Titles, Descriptions, and Filenames for Every Pin
Pinterest reads the words attached to your pin to decide who to show it to. Skip them and you’re flying blind.
First, find the words your reader actually types. The free way takes thirty seconds: start typing a topic into the Pinterest search bar and watch the autocomplete suggestions drop down — those are real searches, ranked by how often people use them. Type “side hustle” and you’ll get things like “side hustle ideas,” “side hustle from home,” “side hustle for moms.” Each one is a pin — and a blog post — waiting to be made. Hit search and you’ll also see a row of colored tiles under the bar. Those are your long-tail keywords: the more specific searches that are easier to rank for when you’re new.
Then put those words to work. Every pin I make gets three things:
- A keyword-rich title — the search term, said like a human. “How to Start a Side Hustle From Home,” not “My Best Tips.”
- A natural description that uses the search words again, plus a few related ones, in a real sentence or two.
- An SEO filename on the image before you upload it. Not
pin-final-v3.png—side-hustle-from-home-tips.png. This one gets ignored constantly, and it’s a free win.
The title does most of the heavy lifting, so it’s worth a tweak. Watch what a small change does:
- Weak: “Ways to Make Money Online”
- Better: “7 Easy Ways to Make Money Online From Home”
Same post. The second one wins because the number sets an expectation, “easy” speaks to a beginner, and “from home” matches how people actually search. You don’t have to be clever — you have to be specific.
I’ve built my own little system to do all of this fast. One design, generate the image, resize it, give it the SEO filename, and write the title, description, and alt text to match the keyword. It took me a long time to get that workflow tight, and it saves me hours now. To see how I lean on AI for the heavy lifting, here’s my AI-powered Pinterest workflow.
Expect It to Be Slow — and Ride Out the Algorithm Changes
I’ll be straight with you: Pinterest is harder now than when I started, and it’s slower at the beginning than the highlight-reel posts admit. You’ll pin for weeks and feel like you’re shouting into a void.
Then it starts. Steady, not sudden. A few clicks, then more, then a subscriber, then a few.
The algorithm will also shift on you now and then and scramble your results for a bit. Don’t panic and don’t tear everything down. Every time it’s happened to me, I’ve figured out what the new version wants, adjusted, and watched things come back. Consistency through the wobble is what wins. The people who quit during a dip are the ones who never see the climb.
While you’re waiting on traffic, point what you do get somewhere useful — your email list. A pin can turn a one-time visitor into a subscriber you keep, which matters far more than a click that bounces and never comes back.
The Shortcut I Wish I’d Taken on Day One
If I could redo one thing, I’d have taken a proper Pinterest course at the very start instead of stitching it together from scattered free advice for months.
The one that finally made it click for me was Meagan Williamson’s Pinterest course. I’d already taught myself a lot the slow way, including building out my own AI pin workflow — but I was still missing things, and her course pointed straight at the gaps I didn’t know I had. Stuff I’d been getting subtly wrong suddenly made sense. It’s a paid course, so it’s a “when you’re ready to take Pinterest seriously” move rather than a day-one impulse buy. But I’d have saved myself months if I’d done it first.
If you want to see how she teaches before spending anything, she also runs a free Pinterest class — start there, no card needed, and you’ll know within an hour whether her approach fits how your brain works. And if you’d rather build the foundation from my side first, my Pinterest SEO for beginners guide covers it for free.
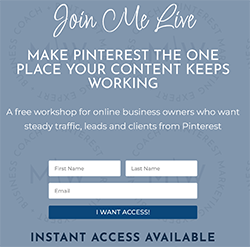
Free Pinterest Training Workshop
Content ideas are only useful if your Pinterest strategy is solid enough to make them work. Meagan Williamson’s free workshop — The Discovery Loop — covers the full system so your content actually gets found.
Your Next Step
If you take one thing from this, make it this: start now, pick one pin design, and keep going through the slow patch. That alone puts you ahead of most people who try Pinterest and quit in month two.
If you’d like the whole thing as a one-page checklist you can keep next to you, I put together a free Pinterest Starter Checklist — every step above stripped down to what to do this week, plus the weekly email where I share what’s working for me right now. Grab it below, then go make your first pin. Today, ideally.
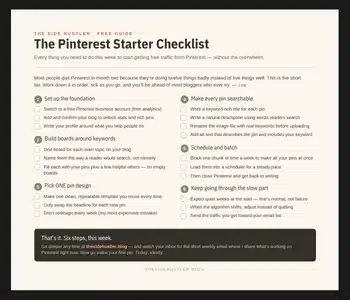
Download Your Free Pinterest Starter Checklist
Grab the free one-page checklist that shows you exactly what to do first, next, and after that.